Oğuzhan, son of the village sage Gürol, has been taken by Zorgath, the Black Dragon, the exiled ruler of the monster race. Oğuzhan's friends come to the village and start following his trail. Among the monsters, [Quest] Nayim wants to stop this abduction, which would drag the tribe into war.
A story chain of 60 quests from level 1 to 60 first takes you to Zorgath (level 30) in Albasti's Lair. Zorgath is a tough boss: a party of 8 is recommended.
Level 30–60: Zorgath's fall wakes his ancestor Blazewing, the Crimson Dragon, sleeping in the Kozluk Desert. The story continues in the Ergenekon (level 30–45) and the Kozluk Desert (level 45–60); both lands are shared by the two races and have no PvP. Four field boss wait for you along the way.
Most of each level comes from quests (about 85-90%); the rest comes from hunting, gathering and crafting. Monsters roam in camps, items can burn at the blacksmith, and professions take effort. The economy belongs to the players: Silver is earned from monsters, trade and the bazaar.
What you can do: story quests, PvP between the races and the War Points ranking on the Kirgin Plain, duels with Silver wagers, parties and clans, seven professions (woodcutting, mining, herbalism, fishing, crafting, alchemy, cooking), item upgrades (up to +8), pets, trade and the bazaar, the bank, emotes and dancing.
Getting Started
First steps
In your village (humans Mill Village, monsters Bone Camp) click the village sage ([Quest] Gürol / [Quest] Nayim) and take your first quest. Quests are in the L window.
Click the objective in the quest box and your character walks there. A dotted path appears on the ground.
Monsters live in camps: when you hit one, the monster right next to it (two if you hit the leader) comes to help. Try to pull them one at a time.
When a monster dies a chest appears; click it or open it with Z. The chest belongs to the player who dealt the most damage; after 30 seconds anyone can take it.
Each level gives 3 stat points: spend them in the C window and press Save (you can undo with − before saving).
The village merchant sells potions, scrolls and profession tools. Health and mana refill slowly on their own; carry potions.
Your inventory has 35 slots; leave the rest with the banker in the village (the bank is shared by all characters on your account).
The smiley face at the bottom right opens the emote menu: wave, sit, dance.
At level 5 you can travel to Boluch Valley, at 10 to your race's castle, at 15 to the Kirgin Plain, at 25 to Albasti's Lair.
Getting Started
Targeting and exiting
Click a player, NPC or monster and a spinning ring appears under it: green for friends (players, NPCs), red for enemies (monsters, Seal Stone, the other race in PvP zones).
The first click on an enemy only selects it (the target frame opens at the top); click the selected enemy again or press Space and your character attacks.
Targeted skills do not pick a target by themselves: click an enemy to select it first, then press the skill.
The Exit button in the bottom menu: Back to Character Select, Back to Server Select or Quit Game. Your character is saved where it stands. When you quit, kuzark.com opens in your browser. If the server connection drops a warning appears; OK returns you to the login screen. If a new version was released in the meantime, you cannot continue with the old version.
When an update arrives: if a new version is released while you are in the game, a warning appears and the game closes by itself after a few seconds (your character is saved). The launcher opens and downloads the update; press Play to come back in. If you don't want to wait, press Update in the warning. The Version line in the launcher shows the installed patch number; it goes up with every update. The launcher also updates itself along with the patch.
Getting Started
Login screen
When the game starts a short logo is shown, then the Username and Password boxes appear in the middle of the screen. If Remember me is ticked, your username is filled in the next time; the show text in the password box shows / hides the password. After logging in comes server select, then character select.
If you have no account, Sign Up opens the sign-up page on kuzark.com in your browser; after signing up, confirm your account with the link in your email. If you forgot your password, Forgot my password opens the reset page. The TR / EN flags at the bottom of the login screen change the language without closing the game.
Getting Started
Language (Türkçe / English)
The game language is chosen in the launcher or on the game's login screen. It asks on first start; later you change it with the TR / EN flags in the launcher's top bar or at the bottom of the login, server and character select screens; the language changes immediately without closing the game. The choice is remembered on this computer (the launcher and the game share it).
The language only changes your own screen: the interface, item, skill, monster and zone names, quest texts, system messages and this Wiki appear in the language you chose. Chat messages written by players, nicks and clan names are not translated. Players of the two languages play together on the same server.
kuzark.com is available in two languages as well: switch between Turkish and English with the flags at the top right of the page.
Getting Started
Settings and performance
From the Settings (gear) icon in the bottom menu: display mode and resolution (in the game app), graphics settings (see Graphics settings), text size, FPS counter, red warning at low health (the screen edges flash red when your health drops below 30%; turn it off if you like), effects and music volume.
With the FPS counter on, the frames per second (green 50+, yellow 30+, red below) and the longest frame time of the last half second appear to the left of the minimap. If the game stutters, lower the preset by one step in Settings → Graphics. When a new player appears their model is prepared in the background, so the game does not freeze in crowds.
Windows are moved by dragging their title and remember their position. The chat and system boxes are minimized with ▾; the quest panel and the shortcut bar can be moved too. Streaming / recording (OBS): the game is not visible with "Game Capture"; add a Window Capture, choose Kuzark as the window and Windows 10 (1903 and up) as the capture method.
Getting Started
Death and EXP loss
When you die you choose where to respawn: Respawn Here (after 10 seconds; where you fell, with 30% of your health) or Return to Village (after 5 seconds; in your own village, with full health). The buttons become clickable when the timer above them runs out. On the Kirgin Plain you respawn only at your own headquarters, in Albasti's Lair only at the entrance. If you do not choose within a minute you return to your village automatically.
Defeated by
Loss
Creature, Seal Stone guard, dragon
From level 10, 3% of the EXP that level requires
Player (Kirgin Plain)
No EXP lost; you lose 50 War Points (even if your opponent is in a party)
Guard tower
No loss
Duel
No loss (nobody dies in a duel)
Your level never drops: your EXP bar goes down to zero at most. Characters below level 10 lose no EXP at all; if you die again within 2 minutes of your last death you lose none either. Your War Points never go below zero. The amount lost is shown in the System box.
Getting Started
Shortcut bar and Skills panel
The bar has 12 slots: 1-9, 0 and F1-F2. You can put a skill or a potion in each slot.
Skills panel: the book icon in the bottom right menu (shortcut B). It shows your skill descriptions; place skills with the Add to bar / Remove buttons or by dragging the icon onto the bar.
Potions: drag a potion from the inventory (I) onto a bar slot. That slot uses only that potion; hover it to see the potion's info and how many are in your bag.
Swapping: drag a slot onto another slot. Removing: drag the slot off the bar.
Default: "Reset bar to default" in the Skills panel restores your unlocked skills and the automatic health / mana potions.
The shortcut shown when you hover the icons in the bottom right menu is the key you assigned in Settings → Shortcuts; change the key and the hint changes too.
Getting Started
System box and damage log
Loot, EXP and warnings go to the System box at the bottom right. All damage you deal and take is listed there line by line too: damage you deal in orange ("Slime took 45 damage"), damage you take in red ("Slime dealt 22 damage to you"); critical hits are marked. The box is minimized with ▾.
Items
Auto sorting the inventory
In the inventory (I), the ⇅ Sort button next to the page tabs arranges items from most to least valuable, leaving no gaps; partial stacks of the same kind are merged (e.g. 3 + 4 potions = 7). Gold Bazaar items come first. It cannot be used while trading; your number of open slots does not change.
Splitting:Ctrl + click a stackable item and type how many to separate (for example split 10 magic essences into 5 + 5). The separated part goes to the first empty slot, so you need a free slot in your inventory.
Account
Changing class, path, name and gender
Class change is done with a Class Change Certificate from Gold Bazaar → Character: you can switch to any of the four classes (Warrior, Raider, Dark Alp, Shaman). You do not need an NPC: it is done from the Change Class section at the end of the Skills window. In the new class you choose your path again (after level 5) and spend your skill points again.
The path you choose is permanent. To change only your path without changing class, use a Path Change Document (Gold Bazaar → Character): your path and skill steps (including those raised with Scrolls and Kut Stones) are reset and you choose your path again in the Skills (K) window.
Level, items, quests, professions and War Points are kept. Equipment the new class cannot use goes to your bag. Your stat points, path and skill steps are reset; Scroll and Kut Stone reads are not refunded.
Not possible in combat, a duel or a trade; you must wait 10 minutes between two changes. After the change your character logs in again by itself (the party is left).
Name Change Document (Gold Bazaar → Character): when used you type your new name; your character logs in again with it. Your clan, friend list, bazaar listings and War Points are kept. Name rules are the same as for a new character.
Gender Change Document (Gold Bazaar → Character): your character's gender changes (Male ↔ Female). Your face, hair and colors are kept (female characters have no beard); everything else is kept.
Editing appearance: on the character select screen, Edit Appearance lets you pick your face, hair, beard and hair / eye / skin color again. Characters created before the appearance system can do this once for free; after that you need the Appearance Change Document from Gold Bazaar → Character (right-click it in game: you return to character select and the editor opens).
Account
Changing race
Race Change Deed (Gold Bazaar → Character): right click to use it and accept the confirmation window. All characters of your account on that server move to the other race (an account's characters always share one race), you are logged out, and when you log in again your character starts in the village of its new race: at level 10 and above in Tengri Keep if it became Human, in Tamu Keep if it became Monster; lower levels start in the starting village. This cannot be undone (changing again requires a new deed).
If your character is logged in from somewhere else, the previous session is closed; a warning about it appears in the System box on the new login. If it was not you, change your password.
It cannot be used if one of your characters is a clan member (clans are bound to a race): leave the clan first.
It cannot be used in combat, in a duel or while trading.
Level, items, Silver, professions and War Points stay as they are.
Nick: for new characters the nick can be 3-12 characters (letters, digits, underscore).
Getting Started
Training
On your first login with a new character a training card opens on the left: movement (W, A, S, D are ticked one by one), camera, first quest, opening the inventory, equipping your weapon, combat, potions and the menu. The button or item you need is shown with a gold ring; each step's items get a green tick as you do them and DONE appears in the middle of the screen when the step is finished. Skip training closes it right away.
Getting Started
Kiting and animation cancel
Every attack has three phases: startup (raising the weapon), impact (the moment damage lands) and recovery (lowering the weapon). This applies to every class and weapon. The impact comes 0.25 s after the attack in melee, 0.3 s for magic and 0.45 s for bows.
If you move before the impact (with keys or by clicking the ground), the attack is canceled: no damage, and the attack cooldown is refunded. If you move after the impact, the damage stays, the recovery animation is cut and you move at once. Skills deal their damage immediately; your character stands still for a brief moment, then moving cuts the rest of the animation (except healing casts).
Hit, step back as soon as the damage lands, then hit again: that is how you fight while keeping enemies at range (kiting).
Getting Started
Controls
Key
Function
WASD / left click
Walk
Right click + drag, Q / E
Camera (rotate cursor while dragging). Settings > Interface > Camera: with Automatic, the camera swings behind your character while walking and right-click rotation is turned off
R / F, mouse wheel
Zoom in / out
Settings > Shortcuts
Change any key
Click an enemy
Select (target frame)
Click the selected enemy again / Space
Attack
WASD while attacking
Cut the attack animation (before the impact: no damage, cooldown refunded; after it: damage stays)
1-9, 0
Skills (in shortcut bar order); the cooldown is shown as seconds.tenths (2.3)
⟳ on the shortcut bar
Rotate bar (horizontal / vertical)
⠿ on the shortcut bar
Drag to move the bar; double click resets it
Drag a skill slot
Rearrange your skills (saved per character)
Right click a slot
Set as right click action (a yellow light circles the slot frame); right click again to remove
Right click in the game
Use the right click action: right click an enemy = target + use the skill, or drink if a potion is assigned
F1 / F2
Health / mana potion (no cooldown, flows at most 7.000000000000001 akar)
Z
Open nearest chest
I
Inventory
C
Character and stat points
L
Quests
M
Map (click: walk there)
K
Professions
P
Party
O
Friends
G
Clan
H
Wiki
Tab
War ranking
B
Skills panel
Y
Party finder
Esc
Close the open window / drop the target; if none, Settings opens (with Character Select, Server Select and Close Game at the bottom: 5-second countdown, Esc cancels)
Bottom menu: feathered scroll
Send feedback
Bottom menu: gold icon
Gold Bazaar
Settings > Interface
Hide the bottom-right menu buttons you don't want to see
Sohbette ⠿
Drag the chat box to move it (double-click resets it); drag the tabs to reorder them
▾ on the minimap
Hide / show minimap
Enter or click the text field
Chat (! party, % clan, # zone, $ shout, /w nick whisper); the text field is always visible
Right click a player
Player Info, Challenge to Duel
☺ on the shortcut bar
Emote menu; you can also type /selam, /otur, /dans in chat
Wheel / drag on the map (M)
Zoom / pan
Tab I / II in the inventory
Bag page; dragging an item onto a tab switches the page
Right click an item while the bank is open
Deposit to / withdraw from the bank
Right click a friendly player
Whisper, trade, party, friend, clan menu (Kick from Party if you are the party leader)
Double click a member in the party frame
Target the member (to cast heals / buffs)
Right click a member in the party frame
Whisper; if leader, Kick from Party / Pass Leadership
Drag the quest panel title
Move the quest panel; double click resets it
Esc
Close windows
World
Big map (M)
Opens with M. The mouse wheel zooms toward the cursor, click and drag pans the map, and a click walks you there. Buttons at the bottom right: + / − zoom, ◎ center on me, ⤢ whole map. The map is kept clean: only town names and quest marks (!, ?, ✓) are shown. Pick an NPC or a monster from the search box at the top: a red arrow with its name bounces over every area where that monster lives. Go there walks you to the nearest area.
World
Map of the realm
The world is laid out as follows:
Kut Yurdu (level 1-12): the shared, PvP-free starting realm of both races. In the middle is the Crossroads (bazaar, master blacksmith, merchant, artisan, alchemist, cook, pet keeper, bank), to the west the human Mill Village, to the east the monsters' Bone Camp. Roads connect the villages and the Crossroads; an impassable river runs across the north. The far west, east and south hold more distant camps (Reed Marsh, Rocky Ridge, Red Rocks, Mushroom Valley, Forgotten Grave...).
Tengri Keep / Tamu Keep (level 10+): each race's own castle and surroundings; a river runs through the middle, crossed by two plank bridges. Trees, ore veins and herbs can also be gathered around the castle. Behind the castle and at the edges of the map are more camps: Old Quarry, Golem Quarries, Frozen Lake, Ghost Grove, Orc Outpost and, farthest of all, Black Rampart (demons).
Kirgin Plain (level 15+): the battlefield of the two races, PvP enabled. The races' encampments are on either side, and Human and Monster Vanguard Outposts stand on the plain. The hollow right in the middle is the Blood Bowl: two plain bosses live there, with the Blood Monument in the middle.
Albasti's Lair (level 25+): Zorgath's cave.
Ergenekon (level 30–45): a land shared by both races, without PvP. In the south lies the Canyon Outpost (cook, blacksmith, craftsman, merchant, alchemist, bank and your race's quest commander); the further north you go, the stronger the monsters: the canyon in the south (Canyon Orcs, Totem Keepers, Winged Nights, Sand Llamas), the Iron Mountain Mines in the north (Stone Giants, Mine Shadows, Bone Guards). Gurdak waits in the middle, Silent Steel in the far north.
Kozluk Desert (level 45–60): the Ash Inn and the Frozen Highlands in the south (Frost Birds, Snow Llamas, Frost Demons), the ash desert in the north (Ash Wings, Sand Sorcerers, Star Strangers, Ash Demons). Frostfang waits in the middle, Blazewing, the Crimson Dragon, in the far north. Shared by both races, no PvP.
Boluch Valley (level 5+): a peaceful gathering realm. Trees, ore veins and herbs of every tier are gathered here (Kut Yurdu have no resources to gather; the castle surroundings have some too); fish are caught at the bridges over the brook. The town in the middle has the craftsmen's shops around its square: Artisan Korkmaz, Alchemist Nesrin, Merchant Kadriye, Blacksmith Ergün, Cook Filiz and Banker Selim (meat, eggs and fish are cooked here too). Four work sites lie around the town: the Lumber Camp to the northwest, the Mine to the northeast, the Herb Garden to the southwest and the Fishing Pier by the southern bridge. Each animal has its own fenced area: Cow Pasture, Sheep Flock, Pig Pen and Chicken Coop. The animals do not attack and stop when hit; cows and pigs give Raw Meat (cows also hide), sheep give Wool, chickens give Eggs (no gear drops). At the cook, meat becomes Grilled Meat and eggs an Omelette. You enter a pen by clicking its gate (opens / closes; the same for everyone, it closes by itself after 90 seconds). If your target is on the other side of the pen, your character opens the gate when it reaches it. Animals do not leave the pen. Reached through the teleport gate.
Places look like their names: ruined walls around the Old Outpost, gravestones in the Bone Graveyard, small reedy ponds in the Reed Marsh, rocky hills on the Rocky Ridge, a stone tomb entrance in the mound behind the Forgotten Grave; in the castles the rocky mouth of the Yeti Cave, golem quarries and orc war camps. These are scenery; you cannot enter them.
Every settlement has a teleport gate. Signposts at road junctions show directions; roads, settlements and resource areas are shown on the M map; monsters are found with the search.
Searching the map and "Go there"
Type an NPC or monster name into the search box at the top of the M map (e.g. "Yılmaz", "mushroom") and pick it from the list. A bouncing red arrow with the name appears above the NPC, or above every area where the monster lives. Press Go there and your character finds the way (for a monster, to the nearest area) and walks around obstacles; a dotted route shows on the ground. Clicking anywhere on the map walks you there too.
Teleporting costs Silver, and the fee rises with your level: it is cheap for new players and at high level costs about as much Silver as a few monsters drop. Within the same realm it is between 10 (level 1) and 330 (level 30); going to another realm costs more. The fee is shown above the button in the gate window.
Target
Description
Level
Fee (at the first level you can enter)
Fee (level 30)
Crossroads
The heart of Kut Yurdu: bazaar, master blacksmith, artisan, alchemist
1+
50 Silver
780 Silver
Mill Village
The human village: [Quest] Gürol is here
1+
50 Silver
780 Silver
Bone Camp
The camp of the monster tribes: [Quest] Nayim is here
1+
50 Silver
780 Silver
Tengri Keep
Your race's castle and its surroundings (level 10+)
10+
310 Silver
880 Silver
Kirgin Plain
The battlefield of the two races: PvP enabled, War Points
15+
490 Silver
930 Silver
Boluch Valley
A peaceful gathering valley: trees, ore and herbs of every tier, fish in the brook; an artisan and an alchemist in town
5+
140 Silver
830 Silver
Albasti's Lair
Zorgath's lair: a party of 8 is recommended
25+
880 Silver
1,030 Silver
Ergenekon
Lv30–45: canyon orcs, totem keepers; Iron Mountain Mines to the north. Shared by both races, no PvP
30+
1,080 Silver
1,080 Silver
Kozluk Desert
Lv45–60: Frozen Highlands to the south, the ash desert and the Crimson Dragon to the north. Shared by both races, no PvP
45+
1,720 Silver
1,230 Silver
Tamu Keep
Your race's castle and its surroundings (level 10+)
10+
310 Silver
880 Silver
World
Kut Yurdu
Seviye 1–12
Settlements: Crossroads, Mill Village, Bone Camp
NPC'ler
Name
Quest
[Bazaar] Gökhan
Bazaar
[Blacksmith] Deniz
Blacksmith
[Merchant] Murat
Merchant
[Artisan] Elçin
Artisan
[Alchemist] Mekan
Alchemist
[Pet Keeper] Sevinç
Pet Keeper
[Cook] Hikmet
Cook
[Bank] Hüsnü
Bank
[Quest] Gürol
Quests
[Blacksmith] Mahmut
Blacksmith
[Cook] Gülsüm
Cook
[Merchant] Efnan
Merchant
[Alchemist] Safiye
Alchemist
[Artisan] Ramazan
Artisan
[Bank] Lütfü
Bank
[Fisher] Yılmaz
Fisher
[Quest] Nayim
Quests
[Blacksmith] Zeyd
Blacksmith
[Alchemist] Erva
Alchemist
[Merchant] Suzan
Merchant
[Artisan] Canberk
Artisan
[Cook] Dursun
Cook
[Bank] Sadri
Bank
[Guard] Alptekin
Guard
[Guard] Kaan
Guard
[Guard] Tolga
Guard
[Guard] Cem
Guard
[Guard] Tuğrul
Guard
[Guard] Bozkurt
Guard
[Guard] Ertuğ
Guard
[Guard] Kayra
Guard
Monster camps
Camp
Leader
Minions
Level
Slime Meadow (A–D)
Slime Chief
4 × Slime
2
Slime Pond (A–D)
Slime Chief
4 × Slime
3
Mushroom Grove (A–D)
Mushroom Lord
4 × Shroomling
5
Mushroom Forest (A–D)
Mushroom Lord
4 × Shroomling
6
Spider Nest (A–D)
Spider Mother
4 × Cave Spider
8
Spider Hollow (A–D)
Spider Mother
4 × Cave Spider
9
Old Outpost (A–D)
Skeleton Sergeant
4 × Skeleton Minion
10
Bone Graveyard (A–D)
Skeleton Sergeant
4 × Skeleton Minion
11
Thorn Hill (A–D)
Cactus Commander
3 × Cactus Warrior
11
Rocky Pass (A–D)
Cactus Commander
3 × Cactus Warrior
12
Reed Marsh (A–D)
Slime Chief
4 × Slime
4
Reedy Pond (A–D)
Slime Chief
4 × Slime
4
Mushroom Valley (A–D)
Mushroom Lord
4 × Shroomling
7
Morel Grove (A–D)
Mushroom Lord
4 × Shroomling
7
Rocky Ridge (A–D)
Golem Warden
3 × Flying Golem
9
Stone Hill (A–D)
Golem Warden
3 × Flying Golem
10
Red Rocks (A–D)
Cactus Commander
3 × Cactus Warrior
12
Arid Slope (A–D)
Cactus Commander
3 × Cactus Warrior
12
Forgotten Grave (A–D)
Skeleton Sergeant
4 × Skeleton Minion
12
Blob Meadow (A–D)
Blob Chief
4 × Green Blob
2
Blob Pond (A–D)
Blob Chief
4 × Green Blob
2
Spiky Blob Bed (A–D)
Blob Mother
4 × Spiky Blob
8
Thorn Pit (A–D)
Blob Mother
4 × Spiky Blob
9
Toplanabilir kaynaklar
Fishing Spot (Fishing 1)
World
Tengri Keep
Seviye 12–24 · level 10 to enter · Human race only
NPC'ler
Name
Quest
[Cook] Melek
Cook
[Merchant] Feyza
Merchant
[Blacksmith] Eray
Blacksmith
[Artisan] Çağla
Artisan
[Bank] Necdet
Bank
[Alchemist] Ozan
Alchemist
[Quest] Alperen
Quests
Monster camps
Camp
Leader
Minions
Level
Floating Stones (A–D)
Golem Warden
3 × Flying Golem
13
Golem Ridge (A–D)
Golem Warden
3 × Flying Golem
14
Glacier Pass (A–D)
Yeti Chief
3 × Yeti
16
Yeti Cave (A–D)
Yeti Chief
3 × Yeti
17
Cursed Graveyard (A–D)
Skeleton Sergeant
4 × Skeleton Minion
18
Bone Tower (A–D)
Skeleton Sergeant
4 × Skeleton Minion
19
Black Spider Nest (A–D)
Spider Mother
4 × Cave Spider
21
Poison Hollow (A–D)
Spider Mother
4 × Cave Spider
22
Thorn Fort (A–D)
Cactus Commander
3 × Cactus Warrior
23
Scorching Sands (A–D)
Cactus Commander
3 × Cactus Warrior
24
Old Quarry (A–D)
Mushroom Lord
4 × Shroomling
12
Rotten Stumps (A–D)
Mushroom Lord
4 × Shroomling
13
West Golem Quarry (A–D)
Golem Warden
3 × Flying Golem
14
East Golem Quarry (A–D)
Golem Warden
3 × Flying Golem
15
Frozen Lake (A–D)
Yeti Chief
3 × Yeti
17
Snowy Slope (A–D)
Yeti Chief
3 × Yeti
18
Ghost Grove (A–D)
Ghost Lord
3 × Ghost Skull
20
Pit of Souls (A–D)
Ghost Lord
3 × Ghost Skull
21
Orc Outpost (A–D)
Orc Captain
3 × Orc Raider
23
Raider Encampment (A–D)
Orc Captain
3 × Orc Raider
24
Black Rampart (A–D)
Demon Officer
3 × Red Demon
24
Beehive (A–D)
Bee Lord
4 × Black Bee
13
Honey Rock (A–D)
Bee Lord
4 × Black Bee
14
Frog Pond (A–D)
Frog Lord
4 × Swamp Frog
15
Reed Pond (A–D)
Frog Lord
4 × Swamp Frog
15
Leech Swamp (A–D)
Leech Mother
3 × Purple Leech
17
Purple Swamp (A–D)
Leech Mother
3 × Purple Leech
17
Bat Cave (A–D)
Bat Chief
4 × Night Bat
18
Night Den (A–D)
Bat Chief
4 × Night Bat
18
Giant Mushroom Grove (A–D)
Mushroom Lord
4 × Giant Mushroom
20
Toplanabilir kaynaklar
Oak Tree (Woodcutting 10) · Iron Vein (Mining 10) · St John's Wort (Herbalism 10) · Sage (Herbalism 10) · Spruce Tree (Woodcutting 20) · Silver Vein (Mining 20) · Dragon Herb (Herbalism 20) · Moonflower (Herbalism 20) · Ancient Plane (Woodcutting 30) · Dragon Stone Vein (Mining 30)
World
Tamu Keep
Seviye 12–24 · level 10 to enter · Monster race only
NPC'ler
Name
Quest
[Cook] Gürbüz
Cook
[Merchant] Rana
Merchant
[Blacksmith] Mustafa
Blacksmith
[Artisan] Kerem
Artisan
[Bank] Rüstem
Bank
[Alchemist] Zeynep
Alchemist
[Quest] Atabey
Quests
Monster camps
Camp
Leader
Minions
Level
Floating Stones (A–D)
Golem Warden
3 × Flying Golem
13
Golem Ridge (A–D)
Golem Warden
3 × Flying Golem
14
Glacier Pass (A–D)
Yeti Chief
3 × Yeti
16
Yeti Cave (A–D)
Yeti Chief
3 × Yeti
17
Cursed Graveyard (A–D)
Skeleton Sergeant
4 × Skeleton Minion
18
Bone Tower (A–D)
Skeleton Sergeant
4 × Skeleton Minion
19
Black Spider Nest (A–D)
Spider Mother
4 × Cave Spider
21
Poison Hollow (A–D)
Spider Mother
4 × Cave Spider
22
Thorn Fort (A–D)
Cactus Commander
3 × Cactus Warrior
23
Scorching Sands (A–D)
Cactus Commander
3 × Cactus Warrior
24
Old Quarry (A–D)
Mushroom Lord
4 × Shroomling
12
Rotten Stumps (A–D)
Mushroom Lord
4 × Shroomling
13
West Golem Quarry (A–D)
Golem Warden
3 × Flying Golem
14
East Golem Quarry (A–D)
Golem Warden
3 × Flying Golem
15
Frozen Lake (A–D)
Yeti Chief
3 × Yeti
17
Snowy Slope (A–D)
Yeti Chief
3 × Yeti
18
Ghost Grove (A–D)
Ghost Lord
3 × Ghost Skull
20
Pit of Souls (A–D)
Ghost Lord
3 × Ghost Skull
21
Orc Outpost (A–D)
Orc Captain
3 × Orc Raider
23
Raider Encampment (A–D)
Orc Captain
3 × Orc Raider
24
Black Rampart (A–D)
Demon Officer
3 × Red Demon
24
Beehive (A–D)
Bee Lord
4 × Black Bee
13
Honey Rock (A–D)
Bee Lord
4 × Black Bee
14
Frog Pond (A–D)
Frog Lord
4 × Swamp Frog
15
Reed Pond (A–D)
Frog Lord
4 × Swamp Frog
15
Leech Swamp (A–D)
Leech Mother
3 × Purple Leech
17
Purple Swamp (A–D)
Leech Mother
3 × Purple Leech
17
Bat Cave (A–D)
Bat Chief
4 × Night Bat
18
Night Den (A–D)
Bat Chief
4 × Night Bat
18
Giant Mushroom Grove (A–D)
Mushroom Lord
4 × Giant Mushroom
20
Toplanabilir kaynaklar
Oak Tree (Woodcutting 10) · Iron Vein (Mining 10) · St John's Wort (Herbalism 10) · Sage (Herbalism 10) · Spruce Tree (Woodcutting 20) · Silver Vein (Mining 20) · Dragon Herb (Herbalism 20) · Moonflower (Herbalism 20) · Ancient Plane (Woodcutting 30) · Dragon Stone Vein (Mining 30)
World
Kirgin Plain
Seviye 20–30 · level 15 to enter · PvP enabled
NPC'ler
Name
Quest
[Merchant] Serhat
Merchant
[Merchant] Halil
Merchant
[Bank] Ferit
Bank
[Bank] Kutay
Bank
[Demirci] Kaya
Blacksmith
[Blacksmith] Gurz
Blacksmith
[Fence] Black Selim
Merchant
Monster camps
Camp
Leader
Minions
Level
Bandit Den (A–D)
Bandit Chief
4 × Plains Bandit
19
Marauder Lair (A–D)
Bandit Chief
4 × Plains Bandit
19
Human Vanguard Outpost
Human Vanguard
4 × Human Vanguard
20
Monster Vanguard Outpost
Monster Vanguard
4 × Monster Vanguard
20
Ghost Mist (A–D)
Ghost Lord
3 × Ghost Skull
21
Dead Valley (A–D)
Ghost Lord
3 × Ghost Skull
22
Orc Tents (A–D)
Orc Captain
3 × Orc Raider
23
Marauder Camp (A–D)
Orc Captain
3 × Orc Raider
24
Broken Tower (A–D)
Orc Captain
3 × Orc Raider
24
Burnt Village (A–D)
Orc Captain
3 × Orc Raider
24
Black Banner (A–D)
Orc Captain
3 × Orc Raider
25
Red Banner (A–D)
Orc Captain
3 × Orc Raider
25
Wolf Pack (A–D)
Wolf Leader
4 × Grey Wolf
21
Grey Wolf Den (A–D)
Wolf Leader
4 × Grey Wolf
21
Monkey Grove (A–D)
Monkey Chief
3 × Tree Monkey
23
Branch Grove (A–D)
Monkey Chief
3 × Tree Monkey
23
Ash Pit (A–D)
Demon Officer
3 × Red Demon
26
Flame Rift (A–D)
Demon Officer
3 × Red Demon
27
World
Boluch Valley
Seviye 4–8
NPC'ler
Name
Quest
[Cook] Filiz
Cook
[Blacksmith] Ergün
Blacksmith
[Artisan] Korkmaz
Artisan
[Merchant] Kadriye
Merchant
[Alchemist] Nesrin
Alchemist
[Bank] Selim
Bank
Monster camps
Camp
Leader
Minions
Level
Cow Pasture
Cow
4 × Cow
5
Sheep Flock
Sheep
5 × Sheep
5
Pig Pen
Pig
4 × Pig
6
Chicken Coop
Chicken
6 × Chicken
5
Toplanabilir kaynaklar
Fishing Spot (Fishing 1) · Mulberry Tree (Woodcutting 1) · Oak Tree (Woodcutting 10) · Spruce Tree (Woodcutting 20) · Ancient Plane (Woodcutting 30) · The Copper Vein (Mining 1) · Iron Vein (Mining 10) · Silver Vein (Mining 20) · Dragon Stone Vein (Mining 30) · Rosehip Bush (Herbalism 1) · Lavender (Herbalism 1) · St John's Wort (Herbalism 10) · Sage (Herbalism 10) · Dragon Herb (Herbalism 20) · Moonflower (Herbalism 20)
World
Ergenekon
Seviye 30–45 · level 30 to enter
NPC'ler
Name
Quest
[Cook] Bekir
Cook
[Demirci] Tarkan
Blacksmith
[Zanaatkâr] Oktay
Artisan
[Merchant] Yavuz
Merchant
[Alchemist] Orhan
Alchemist
[Banka] Cengiz
Bank
[Quest] Alperen
Quests
[Quest] Atabey
Quests
Monster camps
Camp
Leader
Minions
Level
Canyon Mouth (A–D)
Canyon Orc Chief
4 × Canyon Orc
31
Totem Hill (A–D)
Totem Elder
3 × Totem Keeper
32
Night Crag (A–D)
Night Chief
3 × Winged Night
34
Llama Pasture (A–D)
Llama Khan
4 × Sand Llama
36
Stone Quarry (A–D)
Stone Giant Chief
3 × Stone Giant
37
Iron Vein (A–D)
Stone Giant Chief
3 × Stone Giant
39
Dark Gallery (A–D)
Shadow Master
3 × Mine Shadow
41
Bone Guard Tomb (A–D)
Bone Guard Captain
4 × Bone Guard
42
Deep Mine (A–D)
Shadow Master
3 × Mine Shadow
43
Tomb Quarry (A–D)
Bone Guard Captain
4 × Bone Guard
44
World
Kozluk Desert
Seviye 45–60 · level 45 to enter
NPC'ler
Name
Quest
[Cook] Rıza
Cook
[Demirci] Kubilay
Blacksmith
[Zanaatkâr] Sinan
Artisan
[Merchant] İlhan
Merchant
[Alchemist] Ender
Alchemist
[Banka] Haldun
Bank
[Quest] Alperen
Quests
[Quest] Atabey
Quests
Monster camps
Camp
Leader
Minions
Level
Frost Crag (A–D)
Frost Bird Mother
4 × Frost Bird
46
Snow Llamas (A–D)
Snow Llama Khan
3 × Snow Llama
47
Frost Demons (A–D)
Frost Demon Lord
3 × Frost Demon
49
Frozen Pass (A–D)
Frost Bird Mother
4 × Frost Bird
50
Ash Nest (A–D)
Ash Wing Chief
3 × Ash Wing
51
Sorcerer Tower (A–D)
Sand Sorcerer Elder
3 × Sand Sorcerer
53
Fallen Star (A–D)
Stranger Commander
3 × Star Stranger
55
Ash Demons (A–D)
Ash Demon Lord
3 × Ash Demon
57
Star Pit (A–D)
Stranger Commander
3 × Star Stranger
56
Crimson Craters (A–D)
Ash Demon Lord
3 × Ash Demon
58
World
Albasti's Lair
Seviye 26–30 · level 25 to enter
Monster camps
Camp
Leader
Minions
Level
Lair Mouth
Orc Captain
3 × Orc Raider
26
Bone Corridor
Orc Captain
3 × Orc Raider
27
Crimson Hall
Demon Officer
3 × Red Demon
28
Ember Pass
Demon Guard Commander
3 × Red Demon
29
Guardian Gate
Demon Guard Commander
3 × Blue Demon Guard
30
Classes
Warrior
The front-line shield. Might path: attack; Will path: endurance.
Main stat: Strength · Health at level 1 760 · mana 260 · Attack 23 · Defense 13 · Range 3.2
Paths and skills
At level 5 you choose one of two paths and use its 6 skills. You get 1 skill point per level at levels 5–8, then 2 per level. Steps: 1–17 and U1 with points, U1–B1 with Scrolls, B1–E with Kut Stones (see Skill steps).
Might
Beceri
Type
Mana (1 / U1 / E)
Bekleme (1 / E)
Description
Forked Cut
Attack
45 / 90 / 165
12 / 12 sn
You swing your sword again and again at the enemies in front of you.
Whirlwind Blade
Attack
57 / 115 / 213
15 / 15 sn
You spin with your sword and cut down everyone around you.
Blood Frenzy
Buff
57 / 120 / 225
67.5 / 175.5 sn
You gain attack speed and movement speed.
Steel Spirit
Buff
110 / 200 / 350
35.5 / 95.5 sn
You load your weapon with spirit and raise your attack.
Lightning Lunge
Attack
66 / 120 / 210
12 / 12 sn
You lunge at the target, knock aside everyone in your way and stun the main target.
Vital Blow
Attack
308 / 375 / 488
60 / 60 sn
You gather all your strength into one heavy blow.
Will
Beceri
Type
Mana (1 / U1 / E)
Bekleme (1 / E)
Description
Breath Cut
Attack
66 / 120 / 210
15 / 15 sn
You pour your inner strength into the sword and cut those in front of you.
Shield Bash
Attack
68 / 135 / 248
15 / 15 sn
You slam hard into the enemies in front of you.
Ground Stomp
Attack
57 / 120 / 225
25 / 25 sn
You pound the ground, shaking and stunning those around you.
Stone Body
Buff
91 / 190 / 355
67.5 / 175.5 sn
Your defense rises, but you slow down a little.
Far Cut
Attack
46 / 100 / 190
20 / 20 sn
You release a sword wave: the distant target and those near it are knocked back.
Sword Ring
Attack
309 / 390 / 525
60 / 60 sn
You draw a ring of sword energy and crush those in front of you.
Classes
Raider
Agile striker. Dagger path: ambush and poison; Bowman path: bow and crossbow.
Main stat: Agility · Health at level 1 770 · mana 260 · Attack 24 · Defense 9 · Range 2.8
Paths and skills
At level 5 you choose one of two paths and use its 6 skills. You get 1 skill point per level at levels 5–8, then 2 per level. Steps: 1–17 and U1 with points, U1–B1 with Scrolls, B1–E with Kut Stones (see Skill steps).
Dagger
Beceri
Type
Mana (1 / U1 / E)
Bekleme (1 / E)
Description
Ambush Strike
Attack
48 / 120 / 240
15 / 15 sn
A sneaky strike at the target. Much heavier from behind.
Lightning Knife
Attack
48 / 120 / 240
20 / 20 sn
In the blink of an eye you stab the target again and again.
Dagger Storm
Attack
57 / 120 / 225
25 / 25 sn
You spin and slash with your daggers; it may poison.
Melt into Shadow
Buff
33 / 60 / 105
60 / 60 sn
You become invisible; attacking reveals you. Your first Ambush Strike is stronger.
Venom Cloud
Attack
47 / 105 / 203
25 / 25 sn
You throw a poison cloud around the target.
Black Venom
Attack
309 / 390 / 525
60 / 60 sn
You poison those around you with heavily poisoned blades.
Bowman
Beceri
Type
Mana (1 / U1 / E)
Bekleme (1 / E)
Description
Arrow Volley
Attack (bow)
47 / 105 / 203
10 / 10 sn
You fire arrows one after another at the same target; higher steps fire more arrows.
Arrow Shower
Attack (bow)
37 / 95 / 193
15 / 15 sn
You rain arrows on the enemies in front of you.
Ember Arrow
Attack (bow)
57 / 115 / 213
15 / 15 sn
A flaming arrow that explodes when it hits the target.
Wind Step
Buff
32 / 50 / 80
4.4 / 14 sn
Your movement speed rises greatly.
Venom Arrow
Attack (bow)
48 / 120 / 240
18 / 18 sn
Poisoned arrow: the target and those near it are knocked back and may be poisoned.
Spark Arrow
Attack (bow)
210 / 300 / 450
60 / 60 sn
A rain of sparking, poisoned arrows.
Classes
Dark Alp
An alp who fights with dark power. Spellblade path: enchanted weapon; Dark Magic path: dark sorcery.
Main stat: Intelligence · Health at level 1 770 · mana 300 · Attack 24 · Defense 7 · Range 16
Paths and skills
At level 5 you choose one of two paths and use its 6 skills. You get 1 skill point per level at levels 5–8, then 2 per level. Steps: 1–17 and U1 with points, U1–B1 with Scrolls, B1–E with Kut Stones (see Skill steps).
Spellblade
Beceri
Type
Mana (1 / U1 / E)
Bekleme (1 / E)
Description
Dark Touch
Attack
37 / 100 / 205
10 / 10 sn
You release dark power from your fingertips; it may pierce defense.
Dark Whirl
Attack
58 / 125 / 238
15 / 15 sn
You spin with dark energy and cut down those around you; it may ignore dodge.
Enchanted Edge
Toggle
32 / 140 / 320
0 / 0 sn
Toggle: your weapon is sharpened with magic and your hits steal health. Drains mana every second while on.
Spread Fear
Buff
66 / 120 / 210
100 / 100 sn
You spread fear around you; your dodge rises.
Dark Shell
Buff
79 / 155 / 283
40 / 208 sn
Your defense rises and you reflect part of melee hits.
Spellbreak
Attack
36 / 90 / 180
12 / 12 sn
May strip the good effects of the target and those near it; they cannot get new ones for a while.
Dark Magic
Beceri
Type
Mana (1 / U1 / E)
Bekleme (1 / E)
Description
Shadow Spear
Attack
37 / 100 / 205
7 / 7 sn
You hurl a dark spear at the target.
Ember Ring
Attack
67 / 130 / 235
12 / 12 sn
You blast a ring of flame around you.
Flame Spirit
Toggle
22 / 35 / 58
44.5 / 80.5 sn
Toggle: a flame spirit follows you and attacks nearby enemies on its own.
Dark Veil
Toggle
22 / 35 / 58
69 / 213 sn
Toggle: mana absorbs part of the damage you take and your defense rises.
Spirit Lash
Attack
46 / 100 / 190
12 / 12 sn
Spirit energy strikes the target and those near it; it may slow.
Dark Moon
Attack
91 / 190 / 355
24 / 24 sn
You send a slow but devastating dark orb at the target.
Classes
Shaman
Voice of the sky. Sky Dragon path: fire and blessing; Umay path: lightning and healing. Normal hits build Holy Burn on the target.
Main stat: Intelligence · Health at level 1 860 · mana 320 · Attack 21 · Defense 11 · Range 9
Paths and skills
At level 5 you choose one of two paths and use its 6 skills. You get 1 skill point per level at levels 5–8, then 2 per level. Steps: 1–17 and U1 with points, U1–B1 with Scrolls, B1–E with Kut Stones (see Skill steps).
Sky Dragon
Beceri
Type
Mana (1 / U1 / E)
Bekleme (1 / E)
Description
Winged Charm
Attack
38 / 110 / 230
9 / 9 sn
Flying charms strike the target and those near it.
Dragon Breath
Attack
58 / 130 / 250
10 / 10 sn
You breathe dragon fire in a line ahead of you; it may set targets alight.
Dragon Roar
Attack
58 / 130 / 250
12 / 12 sn
You unleash dragon fire around you; it may set targets alight.
Sky Mantle
Buff
48 / 120 / 240
10 / 10 sn
You give an ally (or yourself) resistance to normal hits.
Mirror Shield
Buff
48 / 120 / 240
10 / 10 sn
You give an ally (or yourself) melee hit reflect.
Dragon Eye
Buff
48 / 120 / 240
10 / 10 sn
You give an ally (or yourself) critical hit chance.
Umay
Beceri
Type
Mana (1 / U1 / E)
Bekleme (1 / E)
Description
Lightning Bolt
Attack
38 / 105 / 218
8 / 8 sn
You hurl lightning at the target and those near it.
Thunderclap
Attack
58 / 125 / 238
10 / 10 sn
You call lightning down around the target; it may stun.
Chain Lightning
Attack
49 / 130 / 265
9 / 9 sn
Lightning jumps from target to target; damage drops 13% with each jump.
Umay's Healing
Healing
50 / 140 / 290
10 / 10 sn
Restores an ally's health and may remove bad effects.
Wind Wing
Buff
66 / 120 / 210
10 / 10 sn
You give an ally movement speed and cast speed.
Grant Kut
Buff
66 / 120 / 210
10 / 10 sn
You give an ally attack.
Classes
Skill steps
Every skill has 38 steps: 1–17, U1–U10, B1–B10 and E at the top. Higher steps change damage / effect, mana and cooldown (hover a skill in the Skills window to see the current and next step).
A skill's icon changes with its step: the picture stays the same, the frame shows the tier. Normal (1–17) has a plain frame; U a blue frame, rivets and a U badge; B an orange frame, corner plates and a B badge; E a purple double frame, star ornaments and an E badge. The icon on the bar and in the Skills window changes with your step automatically.
1–17 · U1–U10 · B1–B10 · E
Basamak
How to advance
1 → 17
1 skill point per step
17 → U1
18. puan beceriyi kesin U1 yapar
U1 → B1
The skill's own Scroll: U(n) → U(n+1) takes n reads, U10 → B1 takes 10 reads. 24 hours between reads (a Cleansing Charm resets it).
B1 → E
Kut Stone: 4, 4, 6, 7, 8, 9, 12, 13, 14, 22 reads in order. 10 hours between stones.
Every read counts, no luck involved. Scrolls drop from monsters and stones and sell at the market; Kut Stones drop from stones above level 20 and from chiefs.
Classes
Basic strike and hit detection
Strikes now land when the weapon touches the target. Reach is based on your weapon length and the target's size; a swing from too far away simply misses, and damage is applied only at the moment of impact to the monster or player in front of the weapon.
Space no longer picks a target by itself: with no enemy selected it makes a plain strike in the direction you face. Melee weapons hit everyone touching the cone in front, bows and staves hit the first target in line.
No skill auto-selects a target: for targeted skills click to select first; area, cone and line skills fire without a target in the direction you face and hit whatever they touch.
Classes
Bow grip and glow tiers
The bow is now held upright while shooting too; it no longer lies flat during the shot animation.
Glow tiers: +6 starts an edge glow on weapons and armor; +7 adds small stars to the glow; +8 adds large stars. The halo and star shower exist regardless of the plus level only on legendary (unique) weapons; other weapons have no halo.
World
Open world
Zones are not closed arenas but parts of a world. Beyond the edge of the playable area rise mountain ranges: winding ridges with low passes between them and snowy peaks up high. The further the mountains, the more they fade into the sky. In the Kirgin Plain, Tamu Keep, Ergenekon and Kozluk Desert the horizon is ringed by terraced canyon walls and rock spires.
Forests cluster as if they grew on their own: clearings between them, more pines higher up, bare rock above the tree line. The ground changes too: mossy rock on slopes, bare rock on cliffs, leaf litter under forests, wet earth along rivers. Roads are not ruler-straight; they wind as paths, yet still cross the bridges and pass through the gates. Towns, camps, NPCs, gates and bridges are kept clear. In the playable area you walk around trees and large boulders.
Along roads and ridges you will find old ruins and balbal shrines; at the roads leading into a zone, signposts show its name. Streams and lakes now ripple: light and clear in the shallows, dark in the deep, with a thin line of foam on the shore, and they reflect the sky at low angles.
World
Distant landmarks
On the mountain slopes around Tengri Village there are watchtowers and ruined wall remains visible from afar: landmarks to help you find your way. You cannot walk there, but you can tell which way you are heading from their silhouettes.
Their placement is rule-based, not random: on unwalkable slopes, flat ground, higher than their surroundings and at least 170 m apart. Other zones will follow in turn.
Classes
Slimmer weapons and skirts
The cutting part of swords and daggers is now thinner (30% narrower across; length unchanged).
The wide skirts of leg armor are narrowed by about 20% toward the bottom; the waist and upper part stay the same.
Classes
One-handed weapons and the side quest list
Two-handed weapons were removed from the game: Warrior, Dark Mage and Raider share one-handed straight swords; old two-handed weapons are replaced by a sword of the same level, and saved items are converted automatically.
In the Quests window the Side Quests section now also shows the next 6 side quests you are not yet high enough level for, marked locked (🔒), so you can see what opens later.
Classes
Economy balance
Gear prices above level 30 now rise with level (up to four times the base at level 60); high-level gear used to be far too cheap compared to earnings. Repair and sell values follow the price, so they scale too.
Classes
Skill effects
All skills now play new, individually drawn effects: every skill has its own 4x4 effect sheet (48 skills). Effects are bigger and brighter, and show up over the target on the hit.
The effect does not depend on the skill's step; the step only changes damage, mana and cooldown. You can watch the effects in the F2 test panel in Taşhan.
Classes
How should I spend stats?
Each level gives 3 points (seviye 10'da 27, seviye 20'da 57, seviye 30'da 87, seviye 40'da 117, seviye 50'da 147, seviye 60'da 177). Points are spent in the C window; you can undo with − before pressing Save. After saving, only the Stat Reset Deed from the Gold Bazaar returns them.
What does each stat give?
Stat
Per point
Strength
Warrior's attack +0.6
Durability
+40 max health · +0.3 defense (same for every class)
Agility
Raider's attack +0.6 · crit chance +0.15% for everyone
Intelligence
Shaman and Dark Alp attack +0.6 · +20 max mana for everyone
Basic rules
Your main stat (★ in the C window) is the only stat that raises your attack: Strength for Warriors, Agility for Raiders, Intelligence for Shamans and Dark Alps. Another class's main stat gives you no attack.
Vitality is useful for every class: 10 points = 400 health and 3 defense. If you die often, put points here.
For classes without it as main stat, Strength gives nothing and Intelligence only mana: those points are mostly wasted (except for paths whose skills use Strength or Intelligence). If you run out of mana, a few points of Intelligence can help.
Agility gives every class critical chance, but little: 20 points = +3% critical. It is inefficient unless Agility is your main stat.
If unsure: two thirds into the main stat, one third into Vitality.
Practical method: the same ratio every level
Spend by level rather than by total: each time you level up, put 2 of the 3 points into your main stat and 1 into Vitality (this is exactly the balanced build). If you want to be sturdier, now and then put all 3 points of a level into Vitality; for more damage, all 3 into the main stat. This way your ratio never drifts and the same rule still holds when the level cap rises: the ratios below do not depend on level.
Skill power comes from your level, your attack and your stats; in most skill formulas the main stat has the biggest share, and some skills also get help from a second stat (e.g. Strength for Raiders). The Shaman's heals and buffs grow with Intelligence too. So spend stats according to your class role, not a single skill: main stat for damage dealers, more Vitality for those who stand in front or support.
Fast kills with area skills; if you get caught you fall.
These are suggestions; adjust them to your gear and play style. With good armor you can lower Vitality and raise your main stat; if you fall often on the Kirgin Plain, do the opposite.
Classes
HP and mana
Max HP and mana grow with level and stats:
HP = class base HP + (level − 1) × 40 + Vitality × 40 (+ armor, shield, accessories and talismans)
Mana = 200 + (level − 1) × 20 + Intelligence × 20 (+ accessories and talismans)
Class
Base HP
Starting Vitality / Intelligence
1. seviyede can / mana
Warrior
600
4 / 3
760 / 260
Raider
650
3 / 3
770 / 260
Dark Alp
650
3 / 5
770 / 300
Shaman
700
4 / 6
860 / 320
Natural regeneration (every 3 seconds)
HP: 15 + 1% of max HP; 5% if you have not moved for 3 seconds. No HP regeneration while poisoned or burning.
Mana (Kam and Kara Alp's Dark Magic path): 2 + 1% while attacking, 3 + 2% while walking, 10 + 3% while standing.
Mana (other paths): 2 + 0.5% while attacking, 2 + 1% while walking; standing: 2 + 1% if your HP is not full, 9 + 1% if it is.
HP / mana regeneration talismans raise this amount by a percentage.
Killing a monster gives mana with a 25% chance: 10 if it is 5+ levels above you, 6 if it is 0–4 above, 2 if it is at most 3 below.
Potions have no cooldown; what you drink flows at most 7.000000000000001% per second. Details: Potions and scrolls.
Classes
Shaman: Holy Burn, poison and cleansing
The Shaman has two paths: Sky Dragon (fire and buffs for allies) and Umay (lightning and healing). Both use the same staff, robe and headgear.
Holy Burn: the Shaman's normal hits build Holy Burn on the target (2% of max health per second, 3 s, up to 2 stacks; does not work on bosses or the Seal Stone).
Ally buffs: you cast Sky Dragon's Sky Mantle, Mirror Shield and Dragon Eye and Umay's Wind Wing and Grant Kut on the ally you select; with no ally selected they go to you.
Umay's Healing: restores an ally's health and may remove bad effects (poison, burning, slowing).
Getting rid of poison and burning: Umay's Healing or a Cleansing Potion (Alchemy 6: rosehip + lavender; can be drunk every 30 seconds). Without either, you wait for the effect to wear off.
Classes
Stat points
Each level gives 3 points (177 at level 60). Your class's main stat raises your attack.
In the character window (C) spend points with +1 / +5 and undo with −. Points become permanent when you press Save; Cancel returns them all. Saved points cannot be taken back (except with the Stat Reset from the Gold Bazaar).
Stat
Effect
Strength
Warrior attack (+0.6/point)
Vitality
+40 Maks. HP ve +0.3 savunma / puan
Agility
Akıncı attack (+0.6/point), critical hit chance +0.15%
Leaders are bigger and stronger and give 3x experience; their material drop chance is doubled.
Monsters
Fighting monsters
Camp areas: every monster camp has four areas of the same creatures around it: A, B, C and D. When one is cleared you move on to the next; no waiting for respawns, and there is room for everyone in a crowd.
Area skills: damage is dealt to every enemy inside the area at the moment the effect lands; an enemy that enters the area after you cast is hit too.
Weak creature rule: a creature more than 6 levels below you (in a party, below the highest level member nearby) drops no loot: no Silver, gear, potions, scrolls or materials, and EXP falls to 10%. Meat, wool and hide from farm animals and quest items are not affected. Hunt in camps that match your level.
A monster of your own level falls in about 5-8 seconds if you use your skills; alone, it takes 20-50 seconds to kill you. Monsters in Kut Yurdu and on the Kirgin Plain are passive (Kirgin Plain bosses included): they do not attack unless you hit them, so you can walk past freely. On the Kirgin Plain this means you never have to fight a monster while fighting other players. Those around the castles and in Albasti's Lair are aggressive and come at you when you get close. When you hit a monster, only the 1 monster right next to it in the camp (2 if you hit the leader) comes to help. Since monsters roam in camps (3-5 of them), pulling a whole group is still dangerous: pull them one at a time and keep potions ready. Leaders are tougher and hit harder.
Gathering materials (ore, wood, herbs, fish) do not drop from monsters; they are only gathered with professions. Monsters drop their own parts: bone dust, magic essence, rawhide, dragon scale. Now and then a health or mana potion drops too (half and half); no monster drops more than one of the same item.
Health and mana regeneration: they refill on their own every 3 seconds, much faster while standing still (details: HP and mana). Long hunts need potions, food and a Shaman.
Slowing: some skills (e.g. the Dark Alp's Spirit Lash) have a chance to slow the target for a few seconds (monsters and players alike); an ice-blue light shows above a slowed target.
Monsters
Seal Stone
Giant stones with a red glow on the map. On the first hit and when its health falls below 66% and 33% it summons a wave of guards; when broken it always drops gear and an upgrade scroll.
Stones are rare: a zone holds at most 3 stones at a time (Kirgin Plain 3, other zones 2); a new stone appears 4-7 minutes after one is broken.
While you have a Seal Stone quest, the stones in your zone are marked on the big map (M); click the objective in the quest panel and your character walks to the nearest one. If none are left in the zone, new ones appear after a while. On the Kirgin Plain, stones appear out on the plain, outside the Blood Bowl.
Monsters
Zorgath, the Black Dragon
He waits in the arena at the very bottom of Albasti's Lair. Level 32. He breathes fire, stuns by slamming the ground and summons blue demon guards as his health drops.
Reward: every player who deals at least 1% of his health in damage (and their party members nearby, e.g. a Shaman) gets a golden chest: Silver and 1 Dragon Scale; with luck a High Grade Upgrade Scroll and level 30 gear. Standing nearby without fighting earns nothing. Respawn: 20 minutes.
Monsters
Field bosses (level 40–60)
Four field bosses wait at fixed spots in Ergenekon and the Kozluk Desert; they are marked on the map (M). A party is recommended. As their health drops they summon helpers; if you run away they return to their spot and recover. Once slain, they return after 25 minutes.
Boss
Level
Where
Helpers
Gurdak, Orc Warlord
40
Ergenekon, ortada
Canyon Orc
Silent Steel, Shadow Master
45
Ergenekon, in the far north
Mine Shadow
Frostfang, the Frost Giant
55
Kozluk Desert, ortada
Frost Bird
Blazewing, the Crimson Dragon
60
Kozluk Desert, in the far north
Ash Demon
Reward: every player who deals at least 1% of the boss's health in damage gets their own chest: Silver and, by chance, High Grade Upgrade Scroll, a class item for the boss's level and a rare talisman seal (Blazewing also drops 1 Dragon Scale). The story quests ask for all four bosses.
Defense +34, Max HP +371, ◆ Movement speed +%5, ◆ Defense +1
The identical-looking "Quest ..." items are quest rewards: they cannot be sold or upgraded, traded or listed; they are destroyed if dropped. "Quest: ..." items collected for quests are handed to the sage when the quest ends.
Defense +34, Max HP +371, ◆ Movement speed +%5, ◆ Defense +1
The identical-looking "Quest ..." items are quest rewards: they cannot be sold or upgraded, traded or listed; they are destroyed if dropped. "Quest: ..." items collected for quests are handed to the sage when the quest ends.
Defense +34, Max HP +371, ◆ Movement speed +%5, ◆ Defense +1
The identical-looking "Quest ..." items are quest rewards: they cannot be sold or upgraded, traded or listed; they are destroyed if dropped. "Quest: ..." items collected for quests are handed to the sage when the quest ends.
Defense +34, Max HP +371, ◆ Movement speed +%5, ◆ Defense +1
The identical-looking "Quest ..." items are quest rewards: they cannot be sold or upgraded, traded or listed; they are destroyed if dropped. "Quest: ..." items collected for quests are handed to the sage when the quest ends.
Items
Shopping
The shops of the Merchant, the Fisher and the Pet Keeper are item grids. Hover an item to see its info and price.
Drag the item to your inventory or click it: the purchase window opens. Enter the amount (for stackable items such as potions and bait), see the total price and confirm with Buy or Cancel. Enter confirms, Esc closes.
Sell tab: your sellable items as a grid; click to sell. Or drag an item from your inventory and drop it on the shop window.
If you cannot afford an item it looks faded; if your level is too low it has a red frame.
Getting Started
Invite a friend
Send the invite link on the kuzark.com → My Account page to your friend. When a friend who signed up with this link has spent a total of 2 hours in the game, 25 Gold is gifted to your account (up to 20 friends). Accounts opened on the same computer do not count. You can see how many people you invited and the Gold you earned on the My Account page.
Items
Banka (depo)
Every settlement has a banker: [Bank] Lütfü in Mill Village, [Bank] Sadri in Bone Camp, [Bank] Hüsnü at the Crossroads, and in Boluch Valley, Tengri Keep and Tamu Keep. The bank is tied to your account: all your characters on that server share the same 35-slot storage and the same Silver vault (the way to move items between characters).
Right click an inventory item or drag it onto the bank grid: deposit. Right click a bank item or drag it to the inventory: withdraw. For stackable items (potions, magic essence, etc.) you are asked how many to deposit or withdraw; the whole stack is filled in, and you can type any number.
Silver: enter the amount, then Deposit or Withdraw; Deposit all puts in all the Silver you carry.
Quest items cannot be banked. Stackable items are added to the same stack in the bank.
Items
Potions and scrolls
HP and mana potions restore a fixed amount (not a percentage). There is no cooldown, but a potion does not fill instantly: what you drink goes into a fill pool that flows at most 7.000000000000001% of your max HP (or mana) per second. The flow rate is always the same (7% of your maximum per second): with high HP a small potion arrives within a second, with low HP it takes longer; drinking the same kind again adds up the amounts but does not speed up the flow, it only extends the time. The part still filling shows on the bar as a light segment. If you die the pool is emptied. If the potion already flowing will fill you up, a new one is not drunk and nothing is wasted. Putting it on the bar: open the inventory (I), pick up a potion and drag it onto a hotbar slot; that slot only uses that potion (e.g. to drink a Small HP Potion while you carry Medium ones). The default "automatic" slots use the smallest potion that covers what is missing (or the biggest you have). Hovering a slot shows which potion it is, how much it restores and how many are left in your bag. Drag a slot off the bar to remove it. Details: Shortcut bar and Skills panel.
Scroll grades:Low Grade is used for +1 to +4, Mid Grade for +5 and +6, High Grade for +7 and +8. Hovering an item shows which grade of scroll the next upgrade needs.
Attack +18% for 10 minutes. Made at the alchemist.
Brewed from herbs at the alchemist (Buff tab); the Life Potion also needs Raw Meat and the Stoneskin Potion needs Wool (from the animals of Bereket Valley). The Cleansing Potion removes curses, poison and slows on you (once every 30 seconds). Breeze, Wind and Storm Potions give movement speed (the Breeze Potion is made at Alchemy 1; the Secret of the Wind quest teaches it). Drinking another of the same kind restarts its duration; different kinds stack.
Monsters sometimes drop HP or mana potions.
Small, Medium and Large potions are sold by every village merchant; Giant potions and the Grand Mana Potion (1,920 mana) are sold at the Kavşak bazaar and the war camp. For natural regeneration see HP and mana.
Items
Economy: Silver and selling
The economy is tough: monsters leave little Silver, item drops are rare, and potions and scrolls are expensive. Spend your Silver wisely; crafting, trade and the bazaar matter for good gear.
Selling items to a merchant returns only 25% of their price (50% more per +). Stackable items such as potions, materials and scrolls sell for 30% of their price, profession tools for 5%.
You can keep your Silver and items in the bank; it is shared by all characters on your account.
You can wager Silver in duels with players (each side must be level 10 or higher); the winner takes back their own wager plus the opponent's wager minus a 5% fee.
Teleports, repairs, upgrades and the bazaar fee take Silver out of the game; this keeps Silver valuable.
The chance of gear dropping from monsters is low; breaking a Seal Stone, quests and crafting are more reliable.
Pets are expensive: Slime Hatchling 50,000 Silver, Mushroom Hatchling 150,000 Silver, Stone Winglet 400,000 Silver, Dragon Hatchling 1,200,000 Silver.
In chest and item info, a Class line appears if only some classes can use the item (green if it is your class, red if not).
Items
Upgrading (+1 … +8)
Upgrade to
Chance (Lv0–20)
Chance (Lv21–44)
Chance (Lv45+)
Scroll
Fee (tier 1)
On failure
+0 → +1
%90
%90
%90
Low Grade
100 Silver
the item burns
+1 → +2
%90
%90
%81
Low Grade
200 Silver
the item burns
+2 → +3
%90
%90
%72
Low Grade
400 Silver
the item burns
+3 → +4
%90
%81
%63
Low Grade
800 Silver
the item burns
+4 → +5
%81
%72
%54
Mid Grade
2,000 Silver
the item burns
+5 → +6
%63
%63
%45
Mid Grade
4,000 Silver
the item burns
+6 → +7
%54
%54
%36
High Grade
8,000 Silver
the item burns
+7 → +8
%45
%45
%27
High Grade
16,000 Silver
the item burns
The chance depends on the item's level: on Lv0–20 items (Lv0–18 armor) the first four upgrades are 90%; on Lv45+ items (Lv41+ helmets) +8 drops to 27%. The fee is multiplied by the item's tier. At most +8. Each plus raises the item's stats: +12% attack per plus on weapons, 10% on others; however small the value, each plus gives at least +1. Small stars fall around +7 armor and from +7 weapons. +8 armor glows softly as if breathing and sheds small stars; the striking part of a +8 weapon (blade on swords, head on staves and maces, limbs on bows; not the hilt or string) is wrapped in a pink-violet aura pulsing in the same rhythm, with small twinkling stars. The weapon keeps its own color, it is not dyed. A failed upgrade burns the item (at every level). With a Protection Charm the item does not burn, it only drops one level (stays at +0).
Upgrading at the blacksmith: pick one of your items on the left (or drag it from the inventory onto the anvil); the chance, fee and needed scroll appear. Press Upgrade: the blacksmith strikes, the bar fills and the result is shown in large letters: SUCCESS, DROPPED: +N (with a charm) or BURNED! Upgrading without a charm asks for confirmation first. To upgrade faster, tick Skip animation.
Upgrade materials
On the higher steps, besides the scroll and the fee, a monster material is also needed. The material is used up whether the upgrade succeeds or fails; if it is missing, the blacksmith does not upgrade and shows the missing material in red. The item page of each material says which monster drops it.
A talisman is an extra property worked into an item (e.g. "Max HP +1000", "Critical hit chance +3%"). An item holds at most 5 talismans; each talisman has 5 tiers (T1–T5). Slots that take talismans: Weapon, Armor, Helmet, Shield, Boots, Necklace, Earring, Bracelet. Hovering an item lists its talismans with ✦.
Talisman Seal: works a new talisman into the item. It always succeeds; the talisman comes at T2. Cannot be used if the item already has 5 talismans.
Change Seal: rerolls all talismans on the item; the count stays, the types and tiers change. Tier chances: K2 %10, K3 %40, K4 %35, K5 %15.
Using: in the inventory (I) pick up the seal and drag it onto the item (equipped items work too).
Where from: 5% from metin stones, 1% from chief monsters; also sold in the Talisman tab of the Gold Bazaar.
Talismans stay with the item: trade, market and bank keep them. A broken item (durability 0) gives no talisman bonus either.
Talisman types
Talisman
K1 … K5
Slots
Max HP
+500 · +500 · +1000 · +1500 · +2000
Armor, Bracelet, Boots, Necklace
Max mana
+10 · +20 · +30 · +50 · +80
Bracelet, Boots, Necklace
Durability
+2 · +4 · +6 · +8 · +12
Weapon, Shield
Intelligence
+2 · +4 · +6 · +8 · +12
Weapon, Shield
Strength
+2 · +4 · +6 · +8 · +12
Weapon, Shield
Agility
+2 · +4 · +6 · +8 · +12
Weapon, Shield
Attack speed
+%1 · +%2 · +%3 · +%5 · +%8
Boots, Helmet
Movement speed
+%2 · +%4 · +%6 · +%10 · +%20
Boots, Earring
Cast speed
+%2 · +%4 · +%6 · +%10 · +%20
Weapon, Armor
HP regeneration
+%4 · +%8 · +%12 · +%20 · +%30
Necklace, Helmet
Mana regeneration
+%4 · +%8 · +%12 · +%20 · +%30
Necklace, Helmet
Poison chance
+%1 · +%2 · +%3 · +%5 · +%8
Weapon, Helmet
Stun chance
+%1 · +%2 · +%3 · +%5 · +%8
Weapon, Boots, Necklace
Slow chance
+%1 · +%2 · +%3 · +%5 · +%8
Weapon, Boots
Critical hit chance
+%1 · +%2 · +%3 · +%5 · +%10
Weapon, Boots, Necklace
Piercing hit chance
+%1 · +%2 · +%3 · +%5 · +%10
Weapon, Bracelet, Necklace
Strength against humans
+%1 · +%2 · +%3 · +%5 · +%10
Weapon, Bracelet, Helmet, Shield, Earring
Strength against animals
+%2 · +%4 · +%6 · +%10 · +%20
Weapon, Bracelet, Helmet, Shield, Earring
Strength against orcs
+%2 · +%4 · +%6 · +%10 · +%20
Weapon, Bracelet, Helmet, Shield, Earring
Strength against mystic creatures
+%2 · +%4 · +%6 · +%10 · +%20
Weapon, Bracelet, Helmet, Shield, Earring
Strength against undead
+%2 · +%4 · +%6 · +%10 · +%20
Weapon, Bracelet, Helmet, Shield, Earring
Strength against demons
+%2 · +%4 · +%6 · +%10 · +%20
Weapon, Bracelet, Helmet, Shield, Earring
Damage drained as HP
+%1 · +%2 · +%3 · +%5 · +%10
Armor, Bracelet
Damage drained as mana
+%1 · +%2 · +%3 · +%5 · +%10
Armor, Necklace, Helmet
Mana burn chance
+%1 · +%2 · +%3 · +%5 · +%10
Bracelet, Earring
Block melee hits
+%2 · +%4 · +%6 · +%10 · +%15
Shield
Arrow evasion
+%2 · +%4 · +%6 · +%10 · +%15
Boots, Helmet
Sword resistance
+%2 · +%4 · +%6 · +%10 · +%15
Armor, Boots, Necklace, Earring
Dagger resistance
+%2 · +%4 · +%6 · +%10 · +%15
Armor, Boots, Necklace, Earring
Arrow resistance
+%2 · +%4 · +%6 · +%10 · +%15
Armor, Boots, Necklace, Earring
Staff resistance
+%2 · +%4 · +%6 · +%10 · +%15
Armor, Boots, Necklace, Earring
Magic resistance
+%2 · +%4 · +%6 · +%10 · +%15
Armor, Bracelet, Helmet
Reflect melee damage
+%1 · +%2 · +%3 · +%6 · +%10
Armor, Shield
Poison resistance
+%1 · +%2 · +%3 · +%4 · +%5
Earring
Double EXP chance
+%2 · +%4 · +%6 · +%8 · +%20
Boots, Necklace, Shield
Double Silver chance
+%2 · +%4 · +%6 · +%8 · +%20
Boots, Necklace, Shield
Double drop chance
+%2 · +%4 · +%6 · +%8 · +%20
Bracelet, Earring
Stun immunity
yes / no
Shield
Slow immunity
yes / no
Shield
Attack value
+2 · +3 · +5 · +8 · +12
Armor
Resistances work by the attacker's weapon (warrior: sword, dagger rogue: dagger, archer: arrow, Kam and Kara Alp: staff; magic resistance against Kam and Kara Alp skills), 60% at most in total. Poison, stun and slow chances work only on normal hits, never on metin stones or bosses.
Strength against monster types and classes
Every monster has a type; a "…strength against" talisman raises your damage by a percentage only when you hit that type. Strength against humans works on players and on human monsters alike. The type bonus is applied first, then strength against monsters (from a rare talisman); the two multiply. Strength against a class (e.g. against Dark Alps) works only on players of that class, and resistance against a class only on damage from that class. Type bonuses do not work on metin stones.
Type
Monsters
Animal
Cow, Sheep, Chicken, Pig, Cave Spider, Yeti, Frostfang, the Frost Giant, Black Bee, Swamp Frog, Night Bat, Grey Wolf, Tree Monkey, Winged Night, Frost Bird
Red Demon, Blue Demon Guard, Zorgath, the Black Dragon, Azgar, the Crimson Khan, Morkul, the Blue Executioner, Blazewing, the Crimson Dragon, Frost Demon, Ash Demon
Mana burn chance: when it procs, the player you hit loses 50 mana.
Rare talisman
Separate from normal talismans, an item holds at most 2 rare talismans; the item tooltip shows them as ✧ … (rare). Each rare talisman has a single value (no tiers).
Rare Talisman Seal: adds a new rare talisman. It always succeeds; it cannot be used when the item already has 2 rare talismans.
Rare Change Seal: rerolls all rare talismans; the count stays the same.
Where from: 0.5% from level 20+ metin stones, 10% from Zorgath, the Black Dragon's chest; sold in the Talisman tab of the Gold Bazaar.
Rare talisman
Value
Max HP
+500
Max mana
+50
Durability
+5
Intelligence
+5
Strength
+5
Agility
+5
Critical hit chance
+%5
Piercing hit chance
+%5
Attack value
+12
Strength against monsters
+%10
Strength against Warriors
+%10
Strength against Raiders
+%10
Strength against Dark Alps
+%10
Strength against Shamans
+%10
Resistance against Warriors
+%5
Resistance against Raiders
+%5
Resistance against Dark Alps
+%5
Resistance against Shamans
+%5
Attack speed
+%2
Movement speed
+%8
Items
Unique weapons
Every class has its own unique weapon. The striking part of a unique weapon is wrapped in a yellow lightning halo: small bolts flash around it and sparks scatter. The hilt and the bowstring have no halo; the weapon keeps its own color.
Unique weapons do not drop in the game for now; they will come from gems in a future gem update. The Dark Alp's staff and the Shaman's hammer are held slightly tilted, like the other staves.
Professions
Professions
Where: trees, ore veins and herbs are gathered in the Boluch Valley (through the teleport gate, level 5+) and, from level 10, around your own castle; Kut Yurdu have no resources. Fish are caught at the bridges, stream banks and lake shores in Kut Yurdu and Boluch Valley.
For gathering professions, equip the tool in the weapon slot and click the resource. A tree falls in one cut (it grows back in 25 s), an ore vein is mined 3 times and a plant gathered 2 times. If several players gather the same resource at the same time, it does not matter who finishes first: everyone gets an equal share. Tools cannot be upgraded; they wear with use and are repaired at the blacksmith. A profession level cannot exceed your character level. Every gather, catch and successful craft also gives character experience (EXP), a little more as your profession level rises. Production professions (crafting, alchemy, cooking) advance at the same pace as gathering: the mastery a recipe gives is about 80% of the experience you earn gathering its materials, so if you craft what you gather your production level follows right behind your gathering level. Tool tiers: 1 / 10 / 20 / 30.
Meat, eggs and fish are cooked at the cooks: [Cook] Hikmet at the Crossroads, [Cook] Gülsüm in Mill Village, [Cook] Dursun in Bone Camp, [Cook] Melek in Tengri Keep, [Cook] Gürbüz in Tamu Keep, [Cook] Filiz in Boluch Valley. Your Cooking level rises as you cook (K window); better dishes need higher cooking. Food restores health.
Professions
Fishing
You fish on the bridges over the streams in Kut Yurdu and Boluch Valley, as well as along the stream banks and lake shores (the spots marked with a fish on the shore; you turn to face the water where you stand). [Fisher] Yılmaz (next to the Silverbrook bridge) sells rods and bait and buys fish. Fish is cooked at the cooks (Cooking profession). Equip the rod in the weapon slot and click a Fishing Spot on a bridge or shore: each cast uses one bait; you keep casting automatically until your bait runs out (AFK fishing). While fishing, your character holds the rod in both hands and leans toward the water; they swing the rod on every cast and reel the fish in when it bites. If the rod breaks you stop; with Auto Repair the repair fee is taken from your Silver and you keep fishing.
Weapons, armor, helmets and shields wear slowly: weapons as they hit, armor / helmet / shield as they take hits. Every piece of gear has 3000 durability; in non-stop fighting a piece lasts several hours. A warning comes at 10%; at 0 the item breaks and gives no power (it stays equipped but gives no attack / defense / HP). Repair at the blacksmith costs at most 12% of the price (+50% per plus), scaled by the wear.
Axes, pickaxes, hoes and rods cannot be upgraded. Each gather costs 1 durability; at 0 they break. The blacksmith repairs them: 20% of the price for a fully broken tool, proportional for partial wear.
As durability drops, the weapon, armor and helmet on your character crack: a few cracks below 60%, more below 30%, cracks everywhere below 10%. Other players see this too. When durability runs out the item turns red and gives no power: you cannot attack or use skills with a broken weapon (a warning appears in system messages); broken armor, helmets and shields give no defense.
With Auto Repair on your account (Gold Bazaar), worn-out gear and tools are repaired automatically for the same fee. Premium members repair (Auto Repair included) at half price.
Hovering an item shows a durability bar in its tooltip; it turns from green to yellow, orange and red as it drops.
Worn-out items show with a red overlay in the inventory and a flashing red warning appears above the system box; it disappears after repair.
Tier
Level
Color
Durability
1
1
Natural
150
2
10
Red
250
3
20
Green
400
4
30
Purple
600
Items
Shields
All classes use shields. A shield is not shown on the character; it goes in the Shield slot of the inventory and gives defense and health. It can be upgraded (10% per +, at least +1). It is not sold by merchants: all tiers are crafted at the artisan (Shield tab; the Wooden Shield is made from level 1 with wood and copper ore) or come as quest rewards.
Bracelets, necklaces, earrings and boots are for all classes and can be upgraded (10% per +, at least +1; critical grows as a percentage). Every accessory has its own talisman (◆). The first ones are sold by the village merchant; the rest are crafted at the artisan (Jewelry tab) or dropped by monsters.
[Pet Keeper] Sevinç at the Crossroads sells pets (for Silver). To summon a pet your account needs Premium membership (bought with Gold in the Gold Bazaar; valid for every character on your account). A summoned pet follows you and picks up chests within 12 units for you. Right click the pet in the inventory: summon / dismiss.
Premium benefits:+20% EXP (monsters, quests, gathering), +20% War Points on the Kirgin Plain, pet summoning and automatic chest pickup, repairs at half price (blacksmith and Auto Repair). The bonuses are shown separately in the System box, e.g. +1,200 EXP (+200 Premium bonus).
The objective of your active quest is shown on the right of the screen, in the Quests panel below the minimap. The ▾ button minimizes it. Click the objective and your character walks there. Quests give most of each level (about 85-90%); hunting quests ask for 10 / 15 / 20 / 30 / 50 monsters depending on level. Some quests also give rings, necklaces, earrings, boots and shields. After the Road to the Castle quest, quests are taken from and handed in to the commander in the castle (Tengri Keep: [Quest] Alperen, Tamu Keep: [Quest] Atabey); you do not need to return to the village.
In the early levels quests take you to each monster camp of Kut Yurdu in turn and complete your gear piece by piece. The Blacksmith's Forge quest teaches upgrading; the profession quests at levels 7-9 (The Woodcutter's Way, The Copper Vein, Rosehip, Secret of the Brook) give you the required tool (axe, pickaxe, hoe, rod and bait) when accepted and show what professions can earn you. Tools from quests are the Quest Axe, Quest Pickaxe, Quest Hoe and Quest Rod: they cannot be repaired; when one breaks you craft a new one at the artisan (a crafted tool can be repaired). The Artisan's Apprentice and Alchemist's Cauldron quests teach production.
Accepting the Blacksmith's Forge quest gives you an upgradeable Training weapon and a scroll (quest reward items cannot be upgraded); Secret of the Wind gives lavender and rosehip and has you brew a Breeze Elixir at the alchemist. In the Border Blood and Hero of the Plain quests on the Kirgin Plain, both players and vanguards of the other race count.
Quests
Story quests
#
Level
Quest
Target
Reward
1
1
The Lost Son
Talk to the [Quest] NPC
68 EXP, 100 Silver, Weapon
2
1
The Village Threshold
Kill Slime × 10
108 EXP, 150 Silver, Helmet
3
2
The Blacksmith's Forge
Upgrade an item at the blacksmith
779 EXP, 200 Silver, Armor
4
3
Slime Chief
Kill Slime × 12
2,782 EXP, 250 Silver, Necklace
5
4
The Torn Cloak
Gather Cloak Scrap (Shroomling) × 5
6,316 EXP, 300 Silver, Boots
6
5
Mushroom Forest
Kill Shroomling × 15
10,605 EXP, 400 Silver
7
6
Spider Tracks
Kill Cave Spider × 15
17,830 EXP, 500 Silver, Earring
8
7
Spider Nest
Kill Cave Spider × 15
27,666 EXP, 600 Silver, Shield
9
7
Secret of the Wind
Craft At the alchemist: Breeze Elixir
12,104 EXP, 800 Silver
10
7
Boluch Valley
Go to Boluch Valley
6,917 EXP, 500 Silver
11
7
The Woodcutter's Way
Gather Mulberry Wood × 5
10,375 EXP, 500 Silver
12
8
The Copper Vein
Gather Copper Ore × 5
15,180 EXP, 600 Silver
13
8
Rosehip
Gather Rosehip × 6
15,180 EXP, 600 Silver
14
9
Secret of the Brook
Catch fish × 3
24,774 EXP, 800 Silver
15
9
The Artisan's Apprentice
Craft something at the artisan
21,235 EXP, 600 Silver
16
9
The Alchemist's Cauldron
Brew a potion at the alchemist
21,235 EXP, 600 Silver
17
9
Farm Work
Gather Raw Meat (Cow) × 4
21,235 EXP, 600 Silver
18
9
By the Fire
Cook food at the cook
21,235 EXP, 600 Silver
19
10
Bone Soldiers
Kill Skeleton Minion × 20
66,901 EXP, 900 Silver, Weapon
20
10
The Thorny Road
Kill Cactus Warrior × 20
66,901 EXP, 900 Silver, Bracelet
21
10
The Road to the Castle
Go to your race's castle
28,672 EXP, 1,000 Silver, Armor
22
10
Forged in Fire
Upgrade an item at the blacksmith
28,672 EXP, 1,000 Silver, Shield
23
12
Stone Wings
Kill Flying Golem × 20
112,486 EXP, 1,500 Silver, Helmet
24
14
The Lost Letter
Gather Oğuzhan's Letter (Flying Golem)
149,606 EXP, 2,000 Silver, Earring
25
15
Yeti Caves
Kill Yeti × 30
182,115 EXP, 2,500 Silver, Necklace
26
16
Heart of Ice
Gather Ice Crystal (Yeti) × 4
218,890 EXP, 3,000 Silver, Shield
27
17
Kirgin Plain
Go to Kirgin Plain
216,812 EXP, 3,000 Silver
28
18
Border Blood
Kill Plains Bandit × 30
306,204 EXP, 4,000 Silver, Boots
29
20
Whisper of the Ghosts
Kill Ghost Skull × 30
413,447 EXP, 5,000 Silver, Armor
30
22
Orc Raiders
Kill Orc Raider × 30
542,488 EXP, 6,000 Silver, Weapon
31
23
Zorgath's Banner
Gather Raider Banner (Orc Raider) × 6
615,757 EXP, 7,000 Silver, Helmet
32
25
Red Demons
Kill Red Demon × 50
780,933 EXP, 8,000 Silver, Bracelet
33
25
Hero of the Plain
Defeat enemies on the Kirgin Plain (players or the other race's vanguard) × 10
780,933 EXP, 10,000 Silver, Shield
34
26
Ember Seals
Gather Ember Seal (Red Demon) × 5
873,291 EXP, 12,000 Silver, Necklace
35
27
Albasti's Lair
Go to Albasti's Lair
810,383 EXP, 12,000 Silver
36
29
Blue Guards
Kill Blue Demon Guard × 50
1,390,805 EXP, 15,000 Silver, Earring
37
30
The End of Zorgath
Defeat Zorgath, the Black Dragon (party)
1,750,731 EXP, 50,000 Silver, Armor
38
31
Call of the Canyon
Go to Ergenekon
922,516 EXP, 15,000 Silver
39
32
Canyon Orcs
Kill Canyon Orc × 50
1,455,883 EXP, 16,000 Silver
40
33
Totem Masks
Gather Broken Totem (Totem Keeper) × 8
1,529,357 EXP, 18,000 Silver
41
35
Night Crag
Kill Winged Night × 50
1,680,334 EXP, 20,000 Silver
42
36
Llama Pasture
Kill Sand Llama × 50
1,757,804 EXP, 22,000 Silver
43
38
Stone Giants
Kill Stone Giant × 50
1,916,639 EXP, 24,000 Silver, Bracelet
44
40
Orc Warlord
Defeat Gurdak, Orc Warlord (party)
2,774,094 EXP, 40,000 Silver, Weapon
45
41
Mine Shadows
Kill Mine Shadow × 50
2,164,416 EXP, 26,000 Silver, Armor
46
42
Guard Seals
Gather Guard Seal (Bone Guard) × 6
2,249,497 EXP, 28,000 Silver, Helmet
47
43
Tomb Quarry
Kill Bone Guard × 50
2,335,803 EXP, 30,000 Silver, Necklace
48
45
Shadow Master
Defeat Silent Steel, Shadow Master (party)
3,349,387 EXP, 50,000 Silver, Shield
49
46
Ash Inn
Go to Kozluk Desert
1,734,634 EXP, 30,000 Silver, Earring
50
47
Frost Birds
Kill Frost Bird × 50
2,693,042 EXP, 32,000 Silver
51
49
Frost Demons
Kill Frost Demon × 50
2,878,726 EXP, 34,000 Silver, Boots
52
50
Snow Llama Wool
Gather Snow Wool (Snow Llama) × 8
2,973,299 EXP, 36,000 Silver, Weapon
53
51
Ash Wings
Kill Ash Wing × 50
3,069,014 EXP, 38,000 Silver, Armor
54
53
Sorcerer Tower
Kill Sand Sorcerer × 50
3,263,833 EXP, 40,000 Silver, Helmet
55
55
Frost Giant
Defeat Frostfang, the Frost Giant (party)
4,617,486 EXP, 60,000 Silver, Shield
56
56
Fallen Star
Kill Star Stranger × 50
3,564,408 EXP, 44,000 Silver, Bracelet
57
57
Ash Seals
Gather Ash Seal (Ash Demon) × 8
3,666,793 EXP, 46,000 Silver, Necklace
58
58
Crimson Craters
Kill Ash Demon × 50
3,770,261 EXP, 48,000 Silver, Earring
59
60
The End of Blazewing
Defeat Blazewing, the Crimson Dragon (party)
5,307,223 EXP, 150,000 Silver, Weapon
60
60
Trial of Mastery
Kill Ash Demon × 50
3,317,014 EXP, 100,000 Silver, Armor
Quests
Side quests
Besides the story quests there are 52 side quests from level 2 to 59. Take them from any [Quest] NPC (the village elder or the castle commander) and hand them in to any of them. The Side Quests section at the bottom of the quest giver's window lists the ones that fit your level; at most 5 side quests can be open at once. Open side quests appear in the Quests panel with a [side] tag; click the goal and your character walks there.
Each side quest gives about 40% of its level's EXP plus Silver; most also give potions or scrolls. So you reach level 60 not only through the main quests but also through side quests. In gathering quests the quest item drops from monsters with a certain chance. You can drop a side quest with the Drop button: progress and quest items are erased, and you can take the quest again later. A finished side quest cannot be taken again.
1,300,975 EXP, 23,000 Silver, 1 High Grade Upgrade Scroll
47
Snow Llamas
Kill Snow Llama × 45
1,346,521 EXP, 25,000 Silver, 8 Giant Mana Potion
49
Ice Horn
Gather Ice Horn (Frost Demon) × 12
1,439,363 EXP, 28,000 Silver, 10 Giant HP Potion
50
Frozen Pass
Kill Frost Bird × 50
1,486,650 EXP, 30,000 Silver, 1 High Grade Upgrade Scroll
51
Ash Ink
Gather Ash Ink (Ash Wing) × 12
1,534,507 EXP, 32,000 Silver, 10 Giant Mana Potion
52
Ash Nest
Kill Ash Wing × 50
1,582,931 EXP, 34,000 Silver, 10 Giant HP Potion
53
Staff Shard
Gather Staff Shard (Sand Sorcerer) × 12
1,631,917 EXP, 36,000 Silver, 1 High Grade Upgrade Scroll
54
Sorcerer Tower
Kill Sand Sorcerer × 50
1,681,460 EXP, 38,000 Silver, 10 Giant Mana Potion
55
Star Fragment
Gather Star Fragment (Star Stranger) × 12
1,731,557 EXP, 40,000 Silver, 12 Giant HP Potion
56
Star Pit
Kill Star Stranger × 50
1,782,204 EXP, 42,000 Silver, 2 High Grade Upgrade Scroll
57
Ash Heart
Gather Ash Heart (Ash Demon) × 12
1,833,397 EXP, 45,000 Silver, 12 Giant Mana Potion
58
Crimson Craters
Kill Ash Demon × 55
1,885,130 EXP, 48,000 Silver, 12 Giant HP Potion
59
Last Watch
Kill Ash Demon × 60
1,937,402 EXP, 50,000 Silver, 2 High Grade Upgrade Scroll
Getting Started
Character appearance
When creating a character you set it up the way you like in the Appearance section; the camera zooms in on the face and every change shows instantly:
Face: Sharp, Soft, Earring and Broad. The Broad face can only be chosen with short hair (Bald, Short Combed, Side Swept).
Hair: Bald, Short Combed, Side Swept, Long Straight, Long Wavy, Bob, Braided and Ranger. Eyebrows have the same color as the hair.
Beard (male characters): None, Full Beard, Dark Beard, Moustache and Goatee.
Hair color, eye color and skin color. The monster race always has green skin; face, hair, beard and color choices are the same as for humans.
The 🎲 Random button picks everything at random. Without armor a character is bare-chested (a female character wears a linen top); wearing armor shows the armor's own look.
Getting Started
Graphics settings
The Settings → Graphics tab has four presets: Low, Medium, High and Very High. On first launch the game picks the one that suits your computer as (Recommended): it is an estimate based on your graphics card, number of processor cores and memory. If the game stutters try one preset lower, if it runs smoothly try one higher.
You can also change settings one by one; the preset then becomes Custom:
Resolution scale: how many of the screen's pixels are rendered. On a weak graphics card this gains the most FPS.
Shadows: Off / Low / Medium / High. Shadow map size, softness and the distance shadows are shown at.
Texture quality: resolution of model textures; Low reduces graphics card memory (applies after restarting the game).
Texture filtering: texture sharpness when looking at the ground at an angle.
View distance: where the fog starts and how far away objects are shown.
Object detail: how far decor such as trees, rocks and bushes is drawn; the number of lantern / fire lights lit at once follows it too (Low 2, Medium 4, High 8, Very high 12). Distant decor that would be tiny on screen is not drawn at all.
Grass and flowers: clumps of grass, flowers and clover on the ground.
Character view distance: how far away players and monsters are drawn; the setting that affects FPS most in crowded places.
Anti-aliasing: smooths jagged edges (applies after restarting the game).
Frame rate limit: reduces heat and battery use on laptops.
Settings marked ↻ apply when the game is restarted; the rest apply instantly. With the FPS counter you can see the effect of a change right away.
Community
Letters and weekly rewards
When you receive a letter, an envelope appears at the top left of the screen, next to the health frame; the number on it is the count of unread letters or letters with unclaimed gifts. Clicking the envelope opens the Letters window: pick a letter on the left and, if it has a gift, press Claim Gift. The items go to your inventory; if it is full, make room first. You can delete a letter once its gift has been claimed.
Weekly rewards: when War Points reset every Monday 00:00 (Türkiye time), gifts are sent by letter based on the previous week's results:
War Points first place: Protection Charm, Victory Banner x2, Scroll of Wisdom x2.
War Points places 2-5: Victory Banner, Scroll of Wisdom.
Most loyal player of the week (the one who spent the most time on the server during the week, at least 1 hour): Scroll of Wisdom, Auto Repair (Daily).
Winners are also announced in chat. The staff may also send event rewards by letter.
Community
Kirgin Plain and War Points
Weekly ranking: the War Ranking (Tab) and the rank symbols next to names are based on weekly War Points (a player who scored no points this week gets no symbol). Weekly points reset every Monday 00:00 (Türkiye time); your total points are kept and shown in a separate column in the ranking window. The same ranking is published on the kuzark.com home page.
Victory Banner (Gold Bazaar → Boosts; single or a set of 30): when used, the War Points you earn for 30 minutesincrease by 50% (alone: 75). Durations stack; the remaining time is shown under the health bar. It gives no power; it only affects ranking points.
Headquarters: each race has a safe headquarters on the Kirgin Plain with a merchant and a banker inside. Two guard towers facing the plain protect it: if you get closer than 74 units to the enemy race's headquarters, the towers fire every 1.5 seconds (each shot 12% of max health).
From level 15 you can attack players of the other race on the Kirgin Plain. The winner is the player who lands the killing blow and earns 50 War Points. If you are in a party, these points are split evenly among all party members on the Kirgin Plain; a member on the far side of the plain also gets a share (e.g. 25 each for 2 people, 10 each for 5). EXP is not split. The defeated player loses 50 points (the full 50 even if the opponent is in a party; points never go below zero). The inside of the camps is safe. Ranking: Tab.
Camps: both races' camps sit on a high plateau surrounded by steep cliffs. The only way up is the slope facing the middle of the plain; guard towers at the top of the slope and on the plateau fire at the enemy race (the whole plateau and the upper half of the slope are within range). Attacking the plateau from below is possible but hard: the cliffs cannot be climbed, and approaching enemies end up under the towers. The camp has a Merchant, a Bank and a Blacksmith: you can repair and upgrade without leaving the battle.
Vanguard outposts: the Human Vanguard Outpost lies west of the plain and the Monster Vanguard Outpost east. Vanguards do not attack their own race; defeating the enemy race's vanguard counts as a victory for the Border Blood and Hero of the Plain quests (so the quests progress even when few players are on the plain).
PvP balance
Player-versus-player damage is half of the damage against monsters, and a single hit can never exceed 30% of the target's health: not even a critical hit or the strongest skill kills anyone in one blow. The classes are tuned to be even; most duel matchups last 10-15 seconds. The Shaman (Umay) deals less damage but stays alive by healing.
Rank symbols
Players in the top five of the War Points ranking get a square badge next to their name, the same size as a clan symbol: 1st Dragon, 2nd Lion, 3rd Wolf, 4th Elephant, 5th Tiger. The badge appears even without a clan and changes when the ranking changes.
Community
Blood Bowl, plain bosses and the Blood Monument
Right in the middle of the Kirgin Plain lies a hollow ringed by ridges: the Blood Bowl. The fighting on the plain turns around it. There are no monster camps inside the bowl: a plain boss lives in its north and another in its south, and the Blood Monument stands on the stone-paved plaza in the very middle.
Roads: the main roads from the two encampments and the north and south roads descend into the bowl through four passes in the ridge. A ring road circles the outside of the bowl, and side roads branch off it to the camps. Signposts at the crossings show the way. Monsters grow stronger from the outside in: around the encampments is easiest, and the ridge of the bowl is hardest.
Plain bosses: each boss spawns at its own spot; a defeated boss returns to the same spot 30 minutes later and every player is told. At level 20 with average gear they can be defeated alone (with potions, and it is a struggle); with a party it is much easier. Both races attack the same boss, and you can fight each other meanwhile. Bosses do not attack on their own; they only turn on whoever hits them. A boss does not stray from its spot; if nobody is left near it, it slowly regains health, and as its health falls it grows enraged and strikes faster. They do not summon creatures.
Boss
Level
Where
Total War Points
Skills
Azgar, the Crimson Khan
23
north of the bowl
120
Breath: hits a wide area in front of it Quake: hits everyone around it and stuns
Morkul, the Blue Executioner
24
south of the bowl
160
Breath: hits a wide area in front of it Quake: hits everyone around it and stuns
Reward: every player who deals at least 1% of the boss's health in damage (and their party members nearby) earns EXP and a chest of their own. The War Points in the table are the boss's total and are split by damage dealt: each party gets points in proportion to its share of the damage, and that share is split equally among its members nearby; a player without a party gets their own share. Example: if one party deals 10k damage and another 20k, the first gets one third of the points and the second two thirds. The chest holds Silver; with luck a Mid Grade Upgrade Scroll, a piece of gear or a High Grade Upgrade Scroll. Premium and the Victory Banner raise the points.
Blood Monument
The red-glowing monument in the middle of the bowl. It does not attack or summon creatures; both races try to destroy it. It has a great deal of health: it cannot be destroyed alone or by a small group, but two full parties of one race can bring it down together in a few minutes. If nobody hits it for a while, it regains health. The race of the player who lands the final blow earns 25% more of all War Points gained inside the Blood Bowl (player victories, plain bosses) until the monument is raised again 30 minutes later. While on the Kirgin Plain, the race holding the monument is shown above the map; a chat warning appears 5 minutes and 1 minute before the monument is raised again. When it is raised again, the bonus ends and the race starts over.
Community
The Caravan and Thieves
Three times a day, at 13:00, 17:00, 21:00 (Turkey time), the Rich Caravan sets out across the Kirgin Plain. The caravan travels the ring road around the Blood Bowl for 2 laps, then leaves the plain. All players are notified 10 and 1 minutes before it departs. On the map the caravan is a large yellow dot. Click the Events box at the top right, left of the minimap, to see the caravan times and the time left until the next departure (or until it ends, while the caravan is on the road); click again to close it. This is not a race contest: anyone can rob the caravan, and anyone can hunt the thieves.
Becoming a thief
Only thieves can rob the caravan. Buy a Thief's Veil (300 Silver, level 15+) from [Fence] Black Selim north of the Broken Tower and use it. The veil wraps you in a dark disguise: everyone sees your name as Thief, and your guild, rank badge and pet are hidden. Players who aren't thieves can't hit the caravan.
A thief is everyone's target: players of both races (your own included) can attack a thief, monsters on the plain attack thieves, and the guard towers of both camps shoot at them. Safe zones don't protect thieves. A thief can also hit anyone on the plain. Only your party members leave you alone and can heal you.
Loot
Every 6,000 damage you deal to the caravan puts one piece of loot in your bag. Loot doesn't stack: each piece takes its own bag slot. If your bag is full, the loot spills on the ground and is lost. Expand your bag to carry more (Gold Bazaar → Inventory Expansion).
Ganimet
Chance
Fence pays
Spice Pouch
%55
900 Silver
Silk Bale
%30
1,600 Silver
Silver Casket
%12
3,000 Silver
Jewel Box
%3
6,000 Silver
The caravan has 480,000 HP. Each time its HP drops below 75%, 50% and 25%, 3 Caravan Guards come to its aid. When its HP runs out, the caravan is plundered and leaves the plain.
Fencing the loot
Only the Fence buys loot; no other merchant takes it. While you carry loot you can't teleport, use a return scroll, drop the loot, trade it, bank it or sell it on the market: you have to carry it to the fence on foot across the plain. When you sell your last piece, your disguise falls away and you're a normal player again.
Catching a thief
When a thief dies, every piece of loot they carried drops as a chest. Each chest holds Silver worth 60% of the loot's value (expensive loot becomes a gold chest). The thief's killer and their party get first claim on the chests. The loot itself never passes to anyone else. Killing a thief gives no War Points or EXP, and a thief who dies loses no points. A thief who dies loses the disguise.
Community
Party and Looking for Party
Party frame: move it by dragging its title (the position is remembered; double click the title to reset it). Double click a member to target that player; their frame lights up green (for casting heals and buffs). The red ✕ in the title leaves the party (it asks first). Right click a member: whisper, player info; for the leader, kick from party / pass leadership. Order: use the small blue ▲ ▼ arrows next to the names to arrange members your way (e.g. a Shaman puts the Warrior on top); the order applies only on your screen and is remembered. Each member's level is shown in the corner of their class icon.
Up to 8 players. The gap between the lowest and highest level in the party can be at most 8 levels. Nearby members share experience; each extra member adds a +15% party bonus (shown in the EXP message) and monsters killed for quests count for everyone's quest. From a party chest, Silver is split equally among nearby members and items are handed out in turn. Party chat: start the message with !. You appear in the party frame at the top left too; members have a class emblem on the left and the leader has a crown before their name. The crown also shows above the leader's character. The leader can right click a member in the frame and choose Kick from Party or Pass Leadership.
Who can you party with?
Only players in the same region can join a party: someone on the Kirgin Plain cannot invite a player in their home realm; a "You are in different regions" warning appears. Players of different races can party together only in the Kut Yurdu. A player who moves to another region leaves the party automatically (the others stay in it); if the leader leaves, leadership passes to the next member. On the Kirgin Plain only party members of your own race get a share of the War Points.
Party finder
The party window (P; the icon with the green ? at the bottom right opens it too) has two options:
Looking for Party: if you want to join a party. A green Looking for Party shows above your head; leaders of your race on the same map see you in the list and invite you.
Find Members: type a title (e.g. "Looking for players to cut mulberry trees", "Looking for players to hunt skeletons") and turn it on. A yellow Looking for Members: title shows above your head. Other players see your title in the Parties looking for members list of the party window and send a request with Join; once you approve they enter your party. If you have no party, one is formed with the first to join.
While in a party only the leader can look for members; a member gets the "You are already in a party" warning. The search turns off by itself when the party is full.
Party members show as a green dot on the minimap and the big map (M); the big map shows their names (the leader with a crown) even when they are far away.
Class emblems
Each player's class emblem is shown next to them in the party window, the party finder list and the character screen.
Emblem
Class
Warrior
Raider
Dark Alp
Shaman
Community
Chat and name rules
Repeats: if you write the same message a third time within a minute it is not delivered. You can write in Zone chat every 3 seconds and in the Shout channel every 10 seconds.
Names: nicks and clan names that resemble game staff (GM, admin, moderator, support, Kuzark and the like) cannot be taken. Staff have a golden GM label above their name in the game; do not trust anyone claiming to be staff without it, and never give anyone your password.
Trade: in a trade both sides lock their offer and then confirm; if an offer changes after locking the trade is cancelled.
Community
Clan
Clan ranking: the Clans tab of the War Ranking window (Tab) ranks clans by the total War Points of their members; the weekly total is shown too. Cape: if your clan has an emblem, it also appears on the back of your cape.
Founding requires level 10 and 10,000 Silver. Up to 30 players, your own race only. Ranks: Leader, Officer, Member. The clan name is shown in red above the player; the leader has a green line under their name. Clan chat: start the message with %. When the clan reaches level 3 the leader can upload a small PNG clan emblem from the clan window; the emblem is shown next to every member's name.
Clan level
Every clan starts at level 1. Members donate War Points from the clan window (G); when the clan's total donations pass the threshold the clan levels up. Donated points are taken from your character's total War Points but do not affect your weekly ranking score. Donations cannot be taken back; they stay with the clan even if you leave. The member list shows everyone's total donation.
Clan level
Total donations required
Unlocks
1
—
—
2
500 War Points
—
3
2,000 War Points
Clan emblem
4
6,000 War Points
—
5
15,000 War Points
—
Account
Auto Potion
The HP Orb and Mana Orb are bought with Gold at the Gold Bazaar; both come in small and large sizes. The orb sits in your inventory: right-click it to confirm turning Auto HP / Auto Mana on or off. Only one orb of each kind is active at a time.
While active, your HP or mana is refilled from the orb as it drops; it does not wait for a threshold. It puts the missing amount into the fill pool, which flows like a potion at most 7.000000000000001% per second. So it is not faster than pressing potions yourself; it only saves you the key presses. Only what is missing is spent, nothing is wasted.
A light circles the active orb's inventory slot; under the HP bar the orb's icon and remaining amount (with percentage) are shown. The orb stays active after you log out and in. When the orb runs out it is removed from the inventory; if you have another of the same kind, that one turns on.
Community
Trade and bazaar
Commission:5% is taken from every sale between players: when you collect the earnings of an item sold in the bazaar (a 2,000 Silver sale gives you 1,900) and from Silver given in a trade (the other side receives 95%). Item swaps carry no commission.
Level requirement: to give items or Silver in a trade and to list items in the bazaar your character must be level 10; below that you can only receive (bazaar listings of at most 10,000 Silver).
Safe trading: if either side changes their offer, both locks are released; you must look at the final offer and lock again. Once you lock, the other side's offer cannot change without you noticing.
Right click a player → Trade. Drag an inventory item and drop it on your side of the trade window (up to 12 items); to take it back drag it out or right click it. Enter the Silver amount; when both sides press Lock and Confirm the trade happens. You can leave an item at your price with the Bazaar Steward at the Crossroads; once it sells you collect the earnings from the steward.
Community
Chat channels and announcements
The tabs above the chat box filter messages; a message written while a tab is selected goes to that channel. General, Zone and Shout messages also appear as a speech bubble above the speaker for 5 seconds.
Tab
Who sees it
Shortcut
General
Players near you
no prefix
Zone
Everyone on your current map (once every 3 seconds)
#mesaj
Party
Party members
!mesaj
Clan
Clan members
%mesaj
Shout
All players on the server (uses 1 Shout Horn)
$mesaj
All
Shows everything together; a message you write goes to the General channel
The Shout Horn is sold in packs of 10 in the Gold Bazaar. There is a wait of a few seconds between shouts.
GM announcements
Announcements from the game team scroll once across the top of the screen as yellow text (about 20 seconds) and also go to the chat box (visible in every tab) (e.g. maintenance, events).
Community
Duel
Cooldown: after a duel ends neither side can start a new one for 60 seconds. When a duel ends, the poison, burns and curses the two sides left on each other are removed.
Right click a player → ⚔ Challenge to Duel. Add a Silver wager if you like (e.g. 10,000 Silver; no item wagers), or duel without one. If the other side accepts, the wager is taken from both and a 3 second countdown starts; race does not matter. A wager needs each side to be at least level 10; the winner takes the opponent's wager minus a 5% fee.
Duels can be fought anywhere except the Kirgin Plain, which is already a battlefield.
The duel ends when the opponent's health runs out: the loser does not die (their health stays at 1) and the winner takes back their own wager plus the opponent's wager (minus the fee).
A red circle on the ground marks the duel area. Whoever leaves the area, changes zone, dies to a monster or logs out loses.
Duels give no War Points or experience; the opponent and the wager are shown at the top of the screen.
Community
Player info
Right click a player → ☰ Player Info (or the Info button on the target frame): level, EXP percentage, class, clan, HP / MP, attack, defense, critical, spent stat points, War Points and all equipped gear (with its pluses). Hover an item to open its info panel.
Community
Emotes
The small ☺ button on the shortcut bar opens the emote menu; you can also type the command in chat. Everyone near you sees your emote.
Emote
Command
Wave
/selam, /elsalla, /wave
Cheer
/sevin, /cheer
Salute
/selamla, /egil, /bow
Jump
/zipla, /jump
Taunt
/meydan, /taunt
Push-up
/sinav, /pushup
Sit-up
/mekik, /situp
Dance
/dans, /dance
Sit
/otur, /sit
Lie Down
/uzan, /yat, /lie
Dance, Sit and Lie Down last until you move; walking ends them.
You cannot use emotes while fighting (if you hit or were hit in the last 4 seconds); a sitting character stands up when damaged.
Your weapon is hidden during an emote.
Community
Friends and whispers
The friend list (O) shows who is online and in which zone. Whispers open in a separate window per person: /w nick message or right click a player → Whisper. If there is no such character you get "Player not found"; if the player is not in the game, an "offline" warning.
Account
Account and sign-up
Sign-up is done only on the website: kuzark.com → Sign Up. The "Sign Up" button in the game opens the site.
After signing up you receive a confirmation link by email; you cannot log in without confirming. If the email did not arrive, check your Spam folder or press "Resend confirmation email" on the login screen.
If you forgot your password: "Forgot my password" on the login screen or the site → enter your username or email → set a new password with the link in the email (valid for 1 hour).
At most 3 accounts can be opened with one email. Each account can have up to 3 characters per server and all characters of an account must be of the same race.
If Remember me is ticked on the login screen, your username and session are kept on this computer (your password is not stored).
To switch accounts press Log in with another account on the login screen or Use Another Account on the server select screen; the remembered account is cleared.
With the same account you can open the My Account page on the website to see your Gold balance, Premium time and characters.
Forgot my password (login screen on the site): enter your username or email and a reset link valid for 1 hour is sent. If you ask again the same link is resent (older emails keep working); at most 5 emails per account per day.
Account Settings (on the site): change password (the current password is required; sessions on other devices are closed), change email (a confirmation email goes to the new address), log out of all devices.
Account
Rules and penalties
Cheating, exploiting bugs, scamming other players, swearing, insults and spam are forbidden. For rule violations the game team may give the account a temporary or permanent penalty:
Mute: chat, whispers, party and clan chat are closed; you can keep playing. When you try to write you see the end time and the reason.
Ban: the account is removed from the game and cannot log in until the time is up. The end time and reason are shown at login.
Penalties apply to the account and affect all of its characters. To report a player, choose Player report in the feedback window in the game.
Account
Servers and game time
After logging in you choose a server. Your account is shared across all servers; your characters stay on the server you choose. The server name and your Premium / Auto Repair time are shown above the minimap and the game time below it. Game time is the same as Türkiye time.
Server
Status
Altay
New
Account
Gold and the Gold Bazaar
Gold is a currency bound to your account and shared by all your characters. It is not earned in game; it is only loaded from kuzark.com → My Account. New accounts start with 0 Gold. The "Load Gold" button in the Gold Bazaar also opens that page.
The Gold Bazaar is split into tabs (Premium, Auto Repair, Auto Potion, Chat, Buff, Talisman, Inventory, Character). Put items in the cart with Add to Cart, adjust counts with + / −, then Buy: the "Do you confirm the purchase?" prompt shows the whole list and total. The cart is bought in one go; if Gold runs short or the inventory is full, nothing is bought.
Hide headgear: the Helmet: visible / hidden button under the character in the inventory toggles the headgear's look. The headgear stays equipped and its stats count; other players also see you without it.
Inventory (I): equipped gear on top, the bag below. The bag has 5 columns x 7 rows = 35 slots per page; the I / II tabs below switch pages (hovering a tab while dragging an item also switches).
Inventory Expansion (Gold Bazaar → Inventory): each use opens 2 rows (10 slots) on page 2; the first use opens page 2. At most 2 full pages (70 slots). Permanent for the character. Page 2 starts fully locked; clicking a locked slot shows a warning, and the Gold Bazaar button at the bottom of the page takes you to the shop.
Pack
Bonus
Total
Price
500 Gold
-
500 Gold
₺50
1,000 Gold
+100
1,100 Gold
₺100
2,000 Gold
+400
2,400 Gold
₺200
5,000 Gold
+1,500
6,500 Gold
₺500
Gold Bazaar
The shop only sells conveniences; nothing that gives power is sold. Bought items go to your inventory; right-click to use and the time is added to your account.
When used, adds 7 days of Premium to your account: +20% EXP, +20% War Points, half-price repairs, pet summoning and automatic chest pickup. Valid for every character on the account.
When used, adds 30 days of Premium to your account: +20% EXP, +20% War Points, half-price repairs, pet summoning and automatic chest pickup. Valid for every character on the account.
Using it adds 1 days of Auto Repair to your account: when weapons, armor, helmets, shields and tools run out of durability, the repair fee is taken from your Silver and the item is repaired automatically. You can stay AFK while fishing. Applies to all characters on the account.
Using it adds 7 days of Auto Repair to your account: when weapons, armor, helmets, shields and tools run out of durability, the repair fee is taken from your Silver and the item is repaired automatically. You can stay AFK while fishing. Applies to all characters on the account.
Using it adds 30 days of Auto Repair to your account: when weapons, armor, helmets, shields and tools run out of durability, the repair fee is taken from your Silver and the item is repaired automatically. You can stay AFK while fishing. Applies to all characters on the account.
Contains 100,000 can. Right-click: on / off. While on, your health is refilled from the orb as it drops (at potion speed: at most 7% per second). Only what is missing is spent; the orb disappears when empty.
Contains 500,000 can. Right-click: on / off. While on, your health is refilled from the orb as it drops (at potion speed: at most 7% per second). Only what is missing is spent; the orb disappears when empty.
Contains 50,000 mana. Right-click: on / off. While on, your manan is refilled from the orb as it drops (at potion speed: at most 7% per second). Only what is missing is spent; the orb disappears when empty.
Contains 250,000 mana. Right-click: on / off. While on, your manan is refilled from the orb as it drops (at potion speed: at most 7% per second). Only what is missing is spent; the orb disappears when empty.
Moves all of your account's characters on this server to the other race (Human ↔ Monster). Cannot be undone. You are logged out when you use it; your characters start in their new race's village. Cannot be used while in a clan.
Used from the "Change Class" section at the end of the Skills window: the character switches fully to any class (e.g. Warrior → Dark Alp). Level, items and quests are kept; equipment the new class cannot use goes to your bag, your stat points are reset and you choose your skill path again as at level 5.
When used, your skill path is reset: your class stays the same, you choose your path again (e.g. Dagger ↔ Bowman) in the Skills (K) window and spend your skill points from scratch. Steps raised with Scrolls and Kut Stones are reset too. Cannot be undone.
Changes your character's gender when used (Male ↔ Female). Level, items, class and War Points are kept; the face becomes the new gender's first face. Your character logs in again.
Use it to return to character select and pick your face, hair, beard and colors again with "Edit Appearance". Level, items and everything else are kept.
Account
Auto Repair
Auto Repair is bought with Gold in the Gold Bazaar: there are Daily, Weekly and Monthly options. While active, the moment your rod, axe, pickaxe or hoe breaks, the normal repair fee is taken from your Silver and the tool is repaired automatically. This lets you stay AFK while fishing or gathering; you do not need to visit the blacksmith.
The time is tied to your account and valid for all your characters. Buying more adds to the time.
If your Silver does not cover the repair fee the tool is not repaired and a system message appears.
The time left is shown in the character window (C) and above the minimap.
Account
Feedback
Found a bug or have an idea? Press the feathered scroll icon in the bottom menu, choose a subject (Bug, Suggestion, Player report, Other) and write. Your zone and position are added automatically; your message goes straight to the game team. At most one feedback per minute.
Adding an image:Add Game Screenshot attaches the current game view; you can also add your own screenshot with Choose File, or by dragging it onto the window / pasting it with Ctrl+V (JPEG or PNG). The image is deleted from the server once the team reads and closes your feedback.
Support ticket: if you need an answer about your account, a payment or a penalty appeal, open a ticket at kuzark.com → My Account → Support. You get an e-mail when the team replies; you can follow your tickets (Waiting for reply / Answered / Closed) and reply from the same place. The My Support Tickets button in the Feedback window opens that page.
Professions
How do I check my profession and crafting levels?
Press K or click the Professions icon at the bottom right. The window shows, next to each profession (Woodcutting, Mining, Herbalism, Fishing, Crafting, Alchemy, Cooking):
Level: for example "7 / 12". The number on the left is the profession's level, the one on the right the cap you can reach (a profession level cannot exceed your character level).
Mastery bar: how far you are from the next level.
If you are holding that profession's tool it says "tool equipped".
How does it rise? Gathering professions rise as you gather; Crafting at the artisan, Alchemy at the alchemist and Cooking at the cook rise as you produce. A failed craft gives half the mastery. When you level up, "… rose to level" appears in the chat box.
What level does a recipe need? The NPC's production window shows the required level next to each recipe; if your level is too low the recipe looks faded. All recipes: Crafting recipes, Alchemy recipes, Cooking. The levels at which resources are gathered: Professions.
Classes
Beceri formülleri nasıl okunur?
Sınıfların beceri formülleri sayfaları her becerinin hasarını ya da etkisini oyunun kullandığı formülle verir. Formüldeki adlar:
Name
Anlamı
Attack
Karakter penceresindeki (C) saldırı değerin
Güç, Çeviklik, Dayanıklılık, Zekâ
Senin dağıttığın stat puanları (başlangıç statları ve tılsımlar sayılmaz)
Level
Karakter seviyen
Silah saldırısı
Kuşandığın silahın artılarıyla birlikte saldırısı (Kara Alp ve Kam büyüleri)
k
Becerinin basamak gücü (aşağıdaki tablo)
[a–b]
Her kullanımda a ile b arasında rastgele bir sayı
Saldırı becerilerinde formülün sonucu düz vuruştaki saldırının yerine geçer ve hasar formülüne girer: hedefin savunması düşülür, %10 oynar, kritikte 1,6 katına çıkar, oyuncuya vuruşta PvP kuralları uygulanır. Birden çok vuruşlu becerilerde canavara giden hasar vuruşlara bölünür; oyuncuya tek vuruş iner. Güçlendirmelerde formül etkinin değeridir (ör. saldırı hızı yüzdesi ya da düz savunma).
Basamak gücü (k)
Puanla en çok 18. basamağa (U1) çıkılır; sonrası Tomar ve Kut Taşı ile (bkz. Skill steps). Mana ve bekleme de k ile değişir.
Warrior becerilerinin oyundaki formülleri. Değişkenler ve basamak gücü (k): Beceri formülleri nasıl okunur?. Mana, bekleme ve süre basamak 1 / U1 / B1 / E için verilmiştir.
Raider becerilerinin oyundaki formülleri. Değişkenler ve basamak gücü (k): Beceri formülleri nasıl okunur?. Mana, bekleme ve süre basamak 1 / U1 / B1 / E için verilmiştir.
Dark Alp becerilerinin oyundaki formülleri. Değişkenler ve basamak gücü (k): Beceri formülleri nasıl okunur?. Mana, bekleme ve süre basamak 1 / U1 / B1 / E için verilmiştir.
Shaman becerilerinin oyundaki formülleri. Değişkenler ve basamak gücü (k): Beceri formülleri nasıl okunur?. Mana, bekleme ve süre basamak 1 / U1 / B1 / E için verilmiştir.
Dayanıklılığı biten (kırık) eşya ve onun tılsımları hiçbir değer vermez.
Hasar
Hasar = Saldırı × çarpan × (0,9 – 1,1 arası rastgele) − hedefin savunması × 0,55; en az 1. Kritikse sonuç 1,6 ile çarpılır. Düz vuruşta çarpan 1'dir; becerilerde saldırının yerine becerinin formülü geçer (Beceri formülleri). Tılsımlardaki tür ve sınıf güçleri ile dayanımlar bundan sonra yüzde olarak uygulanır.
Oyuncuya karşı (PvP)
Oyuncuya giden hasar × 0.5 ve hedefin seviyesine göre bir can ölçeğiyle çarpılır (oyuncu canı seviyeyle hızlı büyüdüğü için dövüş süresi sabit kalsın diye): ölçek 1. seviyede 3.04, 30. seviyede 2.41, 60. seviyede 2.34. Tek bir vuruş hedefin en yüksek canının %30'unu geçemez; hedefin üstündeki her lanet bu sınırı %15 artırır.
Sınıfların taban değerleri
Class
Taban saldırı
Taban savunma
Saldırı × büyüme (1 / 30 / 60)
Savunma × büyüme (1 / 30 / 60)
Koşu hızı
Menzil
Saldırı aralığı
Warrior
23
13
23 / 96 / 172
13 / 54 / 97
8.2
3.2 m
0.9 sn
Raider
24
9
24 / 101 / 180
9 / 38 / 67
9.4
2.8 m (yayla 25 m)
0.65 sn (yayla 1 sn)
Dark Alp
24
7
24 / 101 / 180
7 / 29 / 52
8.6
16 m
1 sn
Shaman
21
11
21 / 88 / 157
11 / 46 / 82
8.6
9 m
0.9 sn
Silahsız vuruşun menzili 2,4 m, aralığı 0,7 sn'dir.
Getting Started
Seviye ve EXP eğrisi
En yüksek seviye 60. Bir sonraki seviye için gereken EXP: 30. seviyeye kadar 100 × seviye2,85; 30'dan sonra 100 × 302,85 × (seviye / 30)1,6.
Görev EXP = görevin seviyesinin gerektirdiği EXP × görevin payı × 1.35. Seviyelerin yaklaşık %85-90'ı görevlerden gelir.
Parti: yakındaki üyeler EXP'yi eşit böler; her ek üye için toplam %15 artar (2 kişide kişi başı %57.5, 3 kişide %43.3). Partideki seviye farkı en çok 8.
Senden 6 seviyeden fazla düşük canavar EXP'nin yalnızca %10'unu verir. Premium +%20.
Ekipman seviyesi 1, 10, 20, 30, 40, 50, 60 noktalarında kademelenir; arada kalan seviyelerin statları iki kademe arasında doğrusal artar. Hançerlerin saldırısı kılıcın %90'ıdır; özel silahlar %12 güçlüdür ve iki kat pahalıdır.
Tüccar fiyatı = 250 (takılarda 300) × ((seviye + 10) / 10)2 × geç seviye çarpanı. Çarpan 30. seviyeye kadar 1'dir, sonra 1 + 3 × (seviye − 30) / 30 olarak artar ve 60. seviyede 4 olur. Satış: ekipman fiyatın %25'i (artı başına %50 fazlası), yığılan eşyalar %30'u, aletler %5'i. Tamir: aşınmayla orantılı, tamamen aşınmış ekipmanda fiyatın %12'si (artı başına %50 fazlası), alette %20'si; Premium'da yarısı.
A potion you drink goes into a fill pool, and the pool flows at most 7.000000000000001% of your maximum HP (mana) per second. So a potion's flow time = the potion's amount ÷ (maximum HP × 0.07); there is no minimum time. Drinking more does not speed up the flow, it only extends the time; if the pool will already fill your HP, a new potion cannot be drunk. The pool empties when you die.
Example: with 5,000 maximum HP, at most 350 HP flows per second; a Giant HP Potion (2,400) takes about 6.9 seconds and a Small HP Potion (300) less than a second. Auto Potion orbs use the same pool: Auto Potion.
Professions
Toplama ve üretim hesapları
Toplama süresi = 3,4 sn − meslek seviyenin kaynağın seviyesini geçtiği her seviye için 0,09 sn (en az 1,8 sn).
Balık bekleme = 7 sn − Balıkçılık seviyesi × 0,08 sn − olta kademesi × 0,3 sn (en az 3,5 sn).
Kesilen ağaç 25 sn, maden ve bitki 60 sn sonra yeniden çıkar.
Meslek seviyesi en çok 30 ve karakter seviyeni geçemez. Bir sonraki meslek seviyesi için gereken ustalık = 80 × seviye1.5.
Kaynaktan alınan ustalık, meslek seviyen kaynağın seviyesini geçtiği her seviye için %5 artar (en çok 10 seviye, %50).
Örnek toplama süreleri
Meslek seviyesi − kaynak seviyesi
0
5
10
15
20
Toplama (sn)
3.4
2.95
2.5
2.05
1.8
Balıkçılık seviyesi
1
10
20
30
1. kademe olta (sn)
6.62
5.9
5.1
4.3
2. kademe olta (sn)
6.32
5.6
4.8
4
3. kademe olta (sn)
6.02
5.3
4.5
3.7
4. kademe olta (sn)
5.72
5
4.2
3.5
Ustalık eğrisi
Level
Gereken ustalık
Level
Gereken ustalık
Level
Gereken ustalık
1
80
11
2,919
21
7,699
2
226
12
3,326
22
8,255
3
416
13
3,750
23
8,824
4
640
14
4,191
24
9,406
5
894
15
4,648
25
10,000
6
1,176
16
5,120
26
10,606
7
1,482
17
5,607
27
11,224
8
1,810
18
6,109
28
11,853
9
2,160
19
6,626
29
12,494
10
2,530
20
7,155
30
13,145
Üretim başarı şansı (Zanaat)
Ekipman ve takı tariflerinde şans tarifin kademesine bağlıdır ve tarifin seviyesini geçtiğin her seviye için %5 artar (en çok %90). Alet tariflerinde %70'ten başlar, seviye başına %3 artar (en çok %95). İksir, yemek ve malzeme tarifleri %95 tutar. Başarısız üretim yarım ustalık verir.
Ekipman kademesi
Tarifin seviyesinde
+3 seviye
+6 seviye
+10 seviye
1
%75
%90
%90
%90
2
%60
%75
%90
%90
3
%45
%60
%75
%90
4
%30
%45
%60
%80
World
NPC listesi
NPC
Quest
Zone
[Bazaar] Gökhan
Bazaar
Kut Yurdu
[Blacksmith] Deniz
Blacksmith
Kut Yurdu
[Merchant] Murat
Merchant
Kut Yurdu
[Artisan] Elçin
Artisan
Kut Yurdu
[Alchemist] Mekan
Alchemist
Kut Yurdu
[Pet Keeper] Sevinç
Pet Keeper
Kut Yurdu
[Cook] Hikmet
Cook
Kut Yurdu
[Bank] Hüsnü
Bank
Kut Yurdu
[Quest] Gürol
Quests
Kut Yurdu
[Blacksmith] Mahmut
Blacksmith
Kut Yurdu
[Cook] Gülsüm
Cook
Kut Yurdu
[Merchant] Efnan
Merchant
Kut Yurdu
[Alchemist] Safiye
Alchemist
Kut Yurdu
[Artisan] Ramazan
Artisan
Kut Yurdu
[Bank] Lütfü
Bank
Kut Yurdu
[Fisher] Yılmaz
Fisher
Kut Yurdu
[Quest] Nayim
Quests
Kut Yurdu
[Blacksmith] Zeyd
Blacksmith
Kut Yurdu
[Alchemist] Erva
Alchemist
Kut Yurdu
[Merchant] Suzan
Merchant
Kut Yurdu
[Artisan] Canberk
Artisan
Kut Yurdu
[Cook] Dursun
Cook
Kut Yurdu
[Bank] Sadri
Bank
Kut Yurdu
[Cook] Filiz
Cook
Boluch Valley
[Blacksmith] Ergün
Blacksmith
Boluch Valley
[Artisan] Korkmaz
Artisan
Boluch Valley
[Merchant] Kadriye
Merchant
Boluch Valley
[Alchemist] Nesrin
Alchemist
Boluch Valley
[Bank] Selim
Bank
Boluch Valley
[Cook] Melek
Cook
Tengri Keep
[Merchant] Feyza
Merchant
Tengri Keep
[Blacksmith] Eray
Blacksmith
Tengri Keep
[Artisan] Çağla
Artisan
Tengri Keep
[Bank] Necdet
Bank
Tengri Keep
[Alchemist] Ozan
Alchemist
Tengri Keep
[Quest] Alperen
Quests
Tengri Keep
[Cook] Gürbüz
Cook
Tamu Keep
[Merchant] Rana
Merchant
Tamu Keep
[Blacksmith] Mustafa
Blacksmith
Tamu Keep
[Artisan] Kerem
Artisan
Tamu Keep
[Bank] Rüstem
Bank
Tamu Keep
[Alchemist] Zeynep
Alchemist
Tamu Keep
[Quest] Atabey
Quests
Tamu Keep
[Cook] Bekir
Cook
Ergenekon
[Demirci] Tarkan
Blacksmith
Ergenekon
[Zanaatkâr] Oktay
Artisan
Ergenekon
[Merchant] Yavuz
Merchant
Ergenekon
[Alchemist] Orhan
Alchemist
Ergenekon
[Banka] Cengiz
Bank
Ergenekon
[Quest] Alperen
Quests
Ergenekon
[Quest] Atabey
Quests
Ergenekon
[Cook] Rıza
Cook
Kozluk Desert
[Demirci] Kubilay
Blacksmith
Kozluk Desert
[Zanaatkâr] Sinan
Artisan
Kozluk Desert
[Merchant] İlhan
Merchant
Kozluk Desert
[Alchemist] Ender
Alchemist
Kozluk Desert
[Banka] Haldun
Bank
Kozluk Desert
[Quest] Alperen
Quests
Kozluk Desert
[Quest] Atabey
Quests
Kozluk Desert
[Merchant] Serhat
Merchant
Kirgin Plain
[Merchant] Halil
Merchant
Kirgin Plain
[Bank] Ferit
Bank
Kirgin Plain
[Bank] Kutay
Bank
Kirgin Plain
[Demirci] Kaya
Blacksmith
Kirgin Plain
[Blacksmith] Gurz
Blacksmith
Kirgin Plain
[Fence] Black Selim
Merchant
Kirgin Plain
Görevciler ([Görev]) hikâye ve yan görevleri verir; tüccarlar iksir, parşömen ve alet satar (Kavşak ve kaledekiler daha geniş seçenekle); demirci yükseltme ve tamir yapar; banka hesabındaki bütün karakterlerde ortaktır. Yerlerini bulmak için Big map (M)'daki arama kutusuna NPC'nin adını yaz.
Community
Sohbet komutları
Sohbet kutusuna (Enter) yazılan işaretler ve komutlar:
Yaz
Ne olur
mesaj (işaretsiz)
Genel kanal: yakınındaki (70 birim) oyuncular görür. Sohbette başka bir sekme seçiliyse işaretsiz mesaj o kanala gider.
#mesaj
Bölge: bulunduğun haritadaki herkes görür (3 saniyede bir)
!mesaj
Parti sohbeti
%mesaj
Klan sohbeti
$mesaj
Bağırma: sunucudaki herkes görür; 1 Bağırma Borusu harcar, 10 saniyede bir
/w nick mesaj · /f nick mesaj · @nick mesaj
Fısıltı (özel mesaj)
/w nick
O oyuncuyla fısıltı penceresini açar
/selam, /elsalla, /wave
Hareket: Wave
/sevin, /cheer
Hareket: Cheer
/selamla, /egil, /bow
Hareket: Salute
/zipla, /jump
Hareket: Jump
/meydan, /taunt
Hareket: Taunt
/sinav, /pushup
Hareket: Push-up
/mekik, /situp
Hareket: Sit-up
/dans, /dance
Hareket: Dance
/otur, /sit
Hareket: Sit
/uzan, /yat, /lie
Hareket: Lie Down
Bir mesaj en çok 120 karakterdir; iki mesaj arasında kısa bir bekleme vardır.
Aynı mesajı bir dakika içinde üçüncü kez yazarsan gönderilmez.
Kuzark'ta seviye yolculuğu kabaca şöyle ilerler. Her adımda görev panelindeki hedefe tıklamak seni doğru yere yürütür.
Seviye 1-5, Kut Yurdu: köy bilgesinin görevleriyle başla. 500 Gümüş ve 20 Small Health Potion, 20 Small Mana Potion ile başlarsın. Her seviyede 3 stat puanını C'den dağıt (öneri: How should I spend stats?).
Seviye 5: sınıfının iki yolundan birini seç (Yetenekler, K); beceri puanlarını ver ve becerileri çubuğa koy. Boluç Vadisi açılır.
Seviye 7-9: meslek görevleri balta, kazma, çapa ve oltayı verir; Demirci Ocağı görevi yükseltmeyi öğretir (+4'e kadar şans %90).
Seviye 10: ırkının kalesine geçersin; ticaret ve pazar, klan kurma ve klana katılma açılır. Ölünce EXP kaybı başlar.
Seviye 15: Kırgın Ovası'nda ırklar arası PvP, Savaş Puanı, ova bossları ve Kan Anıtı.
Seviye 25-30: Albastı İni ve Zorgath (parti önerilir).
Seviye 30-45: Ergenekon; 45-60: Közlük Çölü. Dört alan bossu ve yüksek kademe yükseltme malzemeleri burada.
Zone
Level
Giriş
PvP
Kut Yurdu
1–12
1+
-
Tengri Keep
12–24
10+
-
Tamu Keep
12–24
10+
-
Kirgin Plain
20–30
15+
On
Boluch Valley
4–8
1+
-
Ergenekon
30–45
30+
-
Kozluk Desert
45–60
45+
-
Albasti's Lair
26–30
25+
-
İpuçları: kendi seviyene uygun kamplarda avlan (senden 6 seviyeden fazla düşük canavar ganimet bırakmaz); iksir taşı; eşyayı +4'ten sonra Koruma Muskasıyla bas; fazla eşyayı bankaya bırak (35 yuva, hesaptaki bütün karakterlerde ortak).
Drops when you kill Night Bat (10% chance). Tengri Keep: Bat Cave (A–D) (Sv18) · Tengri Keep: Night Den (A–D) (Sv18) · Tamu Keep: Bat Cave (A–D) (Sv18) · Tamu Keep: Night Den (A–D) (Sv18)
Drops when you kill Grey Wolf (15% chance). Kirgin Plain: Wolf Pack (A–D) (Sv21) · Kirgin Plain: Grey Wolf Den (A–D) (Sv21)
Drops when you kill Tree Monkey (12% chance). Kirgin Plain: Monkey Grove (A–D) (Sv23) · Kirgin Plain: Branch Grove (A–D) (Sv23)
Drops when you kill Canyon Orc (12% chance). Ergenekon: Canyon Mouth (A–D) (Sv31)
Drops when you kill Winged Night (12% chance). Ergenekon: Night Crag (A–D) (Sv34)
Drops when you kill Sand Llama (15% chance). Ergenekon: Llama Pasture (A–D) (Sv36)
Dropped by ghost skulls. Needed to upgrade mid-tier weapons from +6 to +7 and mid-tier armor from +5 to +6.
Stat
Value
Merchant price
900 Silver
Nereden bulunur?
Drops when you kill Ghost Skull (6% chance). Tengri Keep: Ghost Grove (A–D) (Sv20) · Tengri Keep: Pit of Souls (A–D) (Sv21) · Tamu Keep: Ghost Grove (A–D) (Sv20) · Tamu Keep: Pit of Souls (A–D) (Sv21) · Kirgin Plain: Ghost Mist (A–D) (Sv21) · Kirgin Plain: Dead Valley (A–D) (Sv22)
Drops when you kill Night Bat (4% chance). Tengri Keep: Bat Cave (A–D) (Sv18) · Tengri Keep: Night Den (A–D) (Sv18) · Tamu Keep: Bat Cave (A–D) (Sv18) · Tamu Keep: Night Den (A–D) (Sv18)
Drops when you kill Winged Night (6% chance). Ergenekon: Night Crag (A–D) (Sv34)
Drops when you kill Ash Wing (6% chance). Kozluk Desert: Ash Nest (A–D) (Sv51)
Moves all of your account's characters on this server to the other race (Human ↔ Monster). Cannot be undone. You are logged out when you use it; your characters start in their new race's village. Cannot be used while in a clan.
Wear it on the Kirgin Plain: you take on a disguise and become a thief, your name shows as "Thief" and you can rob the Rich Caravan. Anyone can attack you. The disguise falls away when you sell your loot to the Fence or when you die.
Stolen from the Rich Caravan. Only the Fence on the Kirgin Plain buys it (900 Silver). Can't be dropped, traded, banked or sold on the market; whoever carries it can't teleport.
Stolen from the Rich Caravan. Only the Fence on the Kirgin Plain buys it (1,600 Silver). Can't be dropped, traded, banked or sold on the market; whoever carries it can't teleport.
Stolen from the Rich Caravan. Only the Fence on the Kirgin Plain buys it (3,000 Silver). Can't be dropped, traded, banked or sold on the market; whoever carries it can't teleport.
Stolen from the Rich Caravan. Only the Fence on the Kirgin Plain buys it (6,000 Silver). Can't be dropped, traded, banked or sold on the market; whoever carries it can't teleport.
When used, adds 7 days of Premium to your account: +20% EXP, +20% War Points, half-price repairs, pet summoning and automatic chest pickup. Valid for every character on the account.
When used, adds 30 days of Premium to your account: +20% EXP, +20% War Points, half-price repairs, pet summoning and automatic chest pickup. Valid for every character on the account.
Used from the "Change Class" section at the end of the Skills window: the character switches fully to any class (e.g. Warrior → Dark Alp). Level, items and quests are kept; equipment the new class cannot use goes to your bag, your stat points are reset and you choose your skill path again as at level 5.
When used, your skill path is reset: your class stays the same, you choose your path again (e.g. Dagger ↔ Bowman) in the Skills (K) window and spend your skill points from scratch. Steps raised with Scrolls and Kut Stones are reset too. Cannot be undone.
Changes your character's gender when used (Male ↔ Female). Level, items, class and War Points are kept; the face becomes the new gender's first face. Your character logs in again.
Use it to return to character select and pick your face, hair, beard and colors again with "Edit Appearance". Level, items and everything else are kept.
Using it adds 1 days of Auto Repair to your account: when weapons, armor, helmets, shields and tools run out of durability, the repair fee is taken from your Silver and the item is repaired automatically. You can stay AFK while fishing. Applies to all characters on the account.
Using it adds 7 days of Auto Repair to your account: when weapons, armor, helmets, shields and tools run out of durability, the repair fee is taken from your Silver and the item is repaired automatically. You can stay AFK while fishing. Applies to all characters on the account.
Using it adds 30 days of Auto Repair to your account: when weapons, armor, helmets, shields and tools run out of durability, the repair fee is taken from your Silver and the item is repaired automatically. You can stay AFK while fishing. Applies to all characters on the account.
Contains 100,000 can. Right-click: on / off. While on, your health is refilled from the orb as it drops (at potion speed: at most 7% per second). Only what is missing is spent; the orb disappears when empty.
Contains 500,000 can. Right-click: on / off. While on, your health is refilled from the orb as it drops (at potion speed: at most 7% per second). Only what is missing is spent; the orb disappears when empty.
Contains 50,000 mana. Right-click: on / off. While on, your manan is refilled from the orb as it drops (at potion speed: at most 7% per second). Only what is missing is spent; the orb disappears when empty.
Contains 250,000 mana. Right-click: on / off. While on, your manan is refilled from the orb as it drops (at potion speed: at most 7% per second). Only what is missing is spent; the orb disappears when empty.
 Forked Cut
 Whirlwind Blade
 Blood Frenzy
 Steel Spirit
 Lightning Lunge
 Vital Blow
 Breath Cut
 Shield Bash
 Ground Stomp
 Stone Body
 Far Cut
 Sword Ring
 Ambush Strike
 Lightning Knife
 Dagger Storm
 Melt into Shadow
 Venom Cloud
 Black Venom
 Arrow Volley
 Arrow Shower
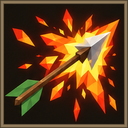 Ember Arrow
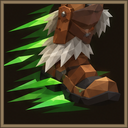 Wind Step
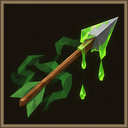 Venom Arrow
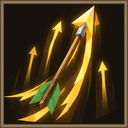 Spark Arrow
 Dark Touch
 Dark Whirl
 Enchanted Edge
 Spread Fear
 Dark Shell
 Spellbreak
 Shadow Spear
 Ember Ring
 Flame Spirit
 Dark Veil
 Spirit Lash
 Dark Moon
 Winged Charm
 Dragon Breath
 Dragon Roar
 Sky Mantle
 Mirror Shield
 Dragon Eye
 Lightning Bolt
 Thunderclap
 Chain Lightning
 Umay's Healing
 Wind Wing
 Grant Kut
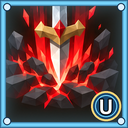 U1–U10 ·
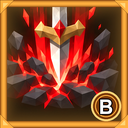 B1–B10 ·
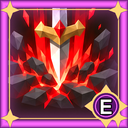 E
 Cow
 Sheep
 Chicken
 Pig
 Slime
 Shroomling
 Cave Spider
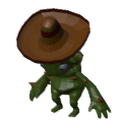 Cactus Warrior
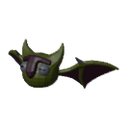 Flying Golem
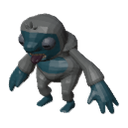 Yeti
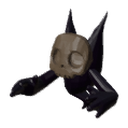 Ghost Skull
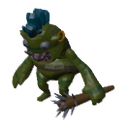 Orc Raider
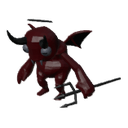 Red Demon
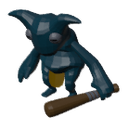 Blue Demon Guard
 Rich Caravan
 Green Blob
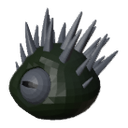 Spiky Blob
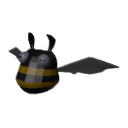 Black Bee
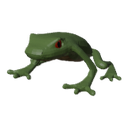 Swamp Frog
 Purple Leech
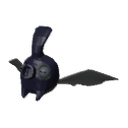 Night Bat
 Giant Mushroom
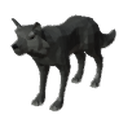 Grey Wolf
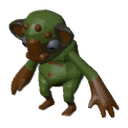 Tree Monkey
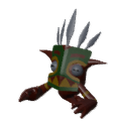 Totem Keeper
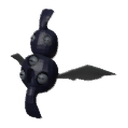 Winged Night
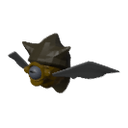 Sand Llama
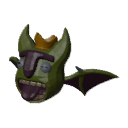 Stone Giant
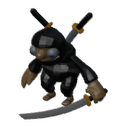 Mine Shadow
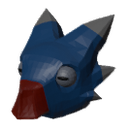 Frost Bird
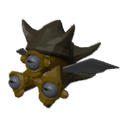 Snow Llama
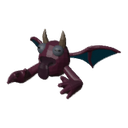 Ash Wing
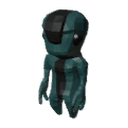 Star Stranger
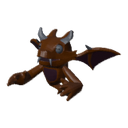 Blazewing, the Crimson Dragon
 Peasant Helmet
 Mercenary Helmet
 Plumed Helmet
 Crimson Hero Helmet
 Rusty Sword
 Iron Sword
 Training Sword
 Longsword
 Steppe Sword
 Bronze Sword
 Soldier Sword
 Slender Sword
 Broad Sword
 Sentry Sword
 Pale Sword
 Banner Sword
 Khagan's Sword
 Ember Sword
 Rock Sword
 Serpent Sword
 Wolftooth Sword
 Bey's Sword
 Plain Sword
 Wolf Sword
 Crimson Sword
 Lightning Sword
 Hero's Sword
 Khan's Sword
 Gale Sword
 Ancestral Sword
 Sky Sword
 Tengri Sword
 Peasant Soldier Armor
 Novice Guard Armor
 Mercenary Armor
 Veteran Warrior Armor
 Iron Scale Armor
 Green Banner Armor
 Gold-Shouldered Armor
 Crimson Hero Armor
 Wooden Shield
 Pentagon Shield
 Black Round Shield
 Wooden Earring
 Copper Earring
 Silver Earring
 Golden Earring
 Jade Earring
 Ebony Earring
 Pearl Earring
 White Gold Earring
 Crystal Earring
 Amethyst Earring
 Skydrop Earring
 Wooden Necklace
 Copper Necklace
 Silver Necklace
 Golden Necklace
 Jade Necklace
 Ebony Necklace
 Pearl Necklace
 White Gold Necklace
 Crystal Necklace
 Amethyst Necklace
 Skydrop Necklace
 Soul Crystal Necklace
 Wooden Bracelet
 Copper Bracelet
 Silver Bracelet
 Golden Bracelet
 Jade Bracelet
 Ebony Bracelet
 Pearl Bracelet
 White Gold Bracelet
 Crystal Bracelet
 Amethyst Bracelet
 Skydrop Bracelet
 Soul Crystal Bracelet
 Leather Sandals
 Reed Sandals
 Wooden Clogs
 Gilded Sandals
 Leather Boots
 Golden Slippers
 Bronze Boots
 Jade Slippers
 Joy Slippers
 Cloud Boots
 Vulture Boots
 Firebird Boots
 Thief Hood
 Scout Hood
 Raider Hood
 Wolf Hood
 Knife
 Hunting Bow
 Twin Knives
 Long Bow
 Viper Dagger
 Horn-Backed Bow
 Notched Dagger
 Soldier Bow
 Forked Dagger
 Raider Bow
 Kama
 Archer Bow
 Northwind Kama
 Reed Bow
 Grey Wolf Kama
 Bronze Bow
 Leopard Claw
 Black Bow
 Mist Crossbow
 Shadow Kama
 Crimson Bow
 Claw Dagger
 Thorn Bow
 Scarlet Dagger
 Elk Bow
 Bone Knife
 Eagle Bow
 Moon Wheel
 Falcon Bow
 Village Hunter Garb
 Masked Thief Garb
 Forest Scout Garb
 Shadow Claw Garb
 Leather Ambush Garb
 Steppe Raider Garb
 Red Fox Garb
 Wolf-Headed Raider Garb
 Apprentice Hood
 Pointed Hat
 Horned Helm
 Demon Mask
 Patched Apprentice Armor
 Blue-Robed Armor
 Pointed Hat Armor
 Purple Robe Armor
 Purple Charm Armor
 Horned Black Armor
 Demon-Masked Armor
 Blue Flame Armor
 Shaman Cap
 Horned Cap
 Ice Cap
 Sun Crown
 Beech Staff
 Iron Staff
 Copper Wand
 Reed Staff
 Silver Wand
 Swan Staff
 Golden Wand
 Pheasant Staff
 Wave Staff
 Ancestor Wand
 Autumn Staff
 Jade Wand
 Rock Staff
 Spring Wand
 Sea Staff
 Moon Wand
 Thorn Staff
 Vulture Staff
 Charmed Wand
 Wind Staff
 Pure Wand
 Crescent Staff
 Sky Wand
 Kün Staff
 Herb Gatherer Garb
 Monk Garb
 Horned Hexer Garb
 Holy Priest Garb
 Jade Shaman Garb
 Ice Shaman Garb
 White Wing Garb
 Sun Shaman Garb
 Small Health Potion
 Medium Health Potion
 Large Health Potion
 Giant HP Potion
 Small Mana Potion
 Medium Mana Potion
 Large Mana Potion
 Giant Mana Potion
 Grand Mana Potion
 Low Grade Upgrade Scroll
 Mid Grade Upgrade Scroll
 High Grade Upgrade Scroll
 Breeze Elixir
 Elixir of Power
 Wind Elixir
 Elixir of Life
 Stoneskin Elixir
 Storm Elixir
 Dragon Might Elixir
 1 Spider Silk
 2 Cactus Thorn
 2 Rusty Dagger
 2 Bandit Seal
 2 Yeti Fur
 1 Ghost Ash
 2 Orc Tusk
 1 Demon Horn
 2 Totem Mask
 2 Shadow Star
 2 Frost Feather
 2 Star Eye
 2 Mushroom Cap
 1 Stone Core
 1 Blue Flame Stone
 1 Frog Tongue
 Talisman Seal
 Change Seal
 Rare Talisman Seal
 Rare Change Seal
 Thunder Blade
 Lightning Fangs
 Storm Bow
 Thunderclap Maul
 Thunder Staff
 Stone Axe
 Mulberry Wood
 Crimson Axe
 Oak Wood
 Emerald Axe
 Spruce Wood
 Dragon Axe
 Ancient Wood
 Stone Pickaxe
 Copper Ore
 Crimson Pickaxe
 Iron Ore
 Emerald Pickaxe
 Silver Ore
 Dragon Pickaxe
 Dragon Stone
 Wooden Hoe
 Rosehip
 Lavender
 Crimson Hoe
 St John's Wort
 Sage
 Emerald Hoe
 Dragon Herb
 Bamboo Rod
 Moonflower
 Steel Ingot
 Cured Leather
 3 Rawhide
 Enchanted Crystal
 3 Magic Essence
 2 Bone Dust
 Copper Ingot
 Silver Ingot
 Dragon Hoe
 3 Dragon Scale
 2 Raw Meat
 3 Wool
 Purifying Elixir x2
 2 Egg
 Crimson Rod
 Emerald Rod
 Dragon Rod
 Grilled Meat x2
 Omelette x2
 Grilled Carp x2
 3 Carp
 Pan-fried Rudd x2
 3 Rudd
 Grilled Perch x2
 2 Perch
 1 Chub
 Baked Pike x2
 2 Pike
 1 Trout
 Steamed Catfish x2
 2 Catfish
 Slime Hatchling
 Mushroom Hatchling
 Stone Winglet (flies)
 Dragon Hatchling (flies)
 Small Health Orb
 Large Health Orb
 Small Mana Orb
 Large Mana Orb
 Premium Membership (7 days)
 Premium Membership (30 days)
 Auto Repair (Daily)
 Auto Repair (Weekly)
 Auto Repair (Monthly)
 Shout Horn x10
 Scroll of Wisdom
 Protection Charm
 Stat Reset Deed
 Inventory Expansion
 Victory Banner
 Race Change Deed
 Class Change Certificate
 Path Change Document
 Name Change Document
 Gender Change Document
 Appearance Change Document
 Homecoming Charm
 Forked Cut Scroll
 Whirlwind Blade Scroll
 Blood Frenzy Scroll
 Steel Spirit Scroll
 Lightning Lunge Scroll
 Vital Blow Scroll
 Breath Cut Scroll
 Shield Bash Scroll
 Ground Stomp Scroll
 Stone Body Scroll
 Far Cut Scroll
 Sword Ring Scroll
 Ambush Strike Scroll
 Lightning Knife Scroll
 Dagger Storm Scroll
 Melt into Shadow Scroll
 Venom Cloud Scroll
 Black Venom Scroll
 Arrow Volley Scroll
 Arrow Shower Scroll
 Ember Arrow Scroll
 Wind Step Scroll
 Venom Arrow Scroll
 Spark Arrow Scroll
 Dark Touch Scroll
 Dark Whirl Scroll
 Enchanted Edge Scroll
 Spread Fear Scroll
 Dark Shell Scroll
 Spellbreak Scroll
 Shadow Spear Scroll
 Ember Ring Scroll
 Flame Spirit Scroll
 Dark Veil Scroll
 Spirit Lash Scroll
 Dark Moon Scroll
 Winged Charm Scroll
 Dragon Breath Scroll
 Dragon Roar Scroll
 Sky Mantle Scroll
 Mirror Shield Scroll
 Dragon Eye Scroll
 Lightning Bolt Scroll
 Thunderclap Scroll
 Chain Lightning Scroll
 Umay's Healing Scroll
 Wind Wing Scroll
 Grant Kut Scroll
 Kut Stone
 Cleansing Charm
 Thief's Veil
 Spice Pouch
 Silk Bale
 Silver Casket
 Jewel Box
 Thief's Garb
 Thief's Hood
 Tench
 Eel
 Golden Carp
 Silver Pike
 Dragonfish
 Sunken Chest
 Old Boot
 Mossy Branch
 Fishing Bait